
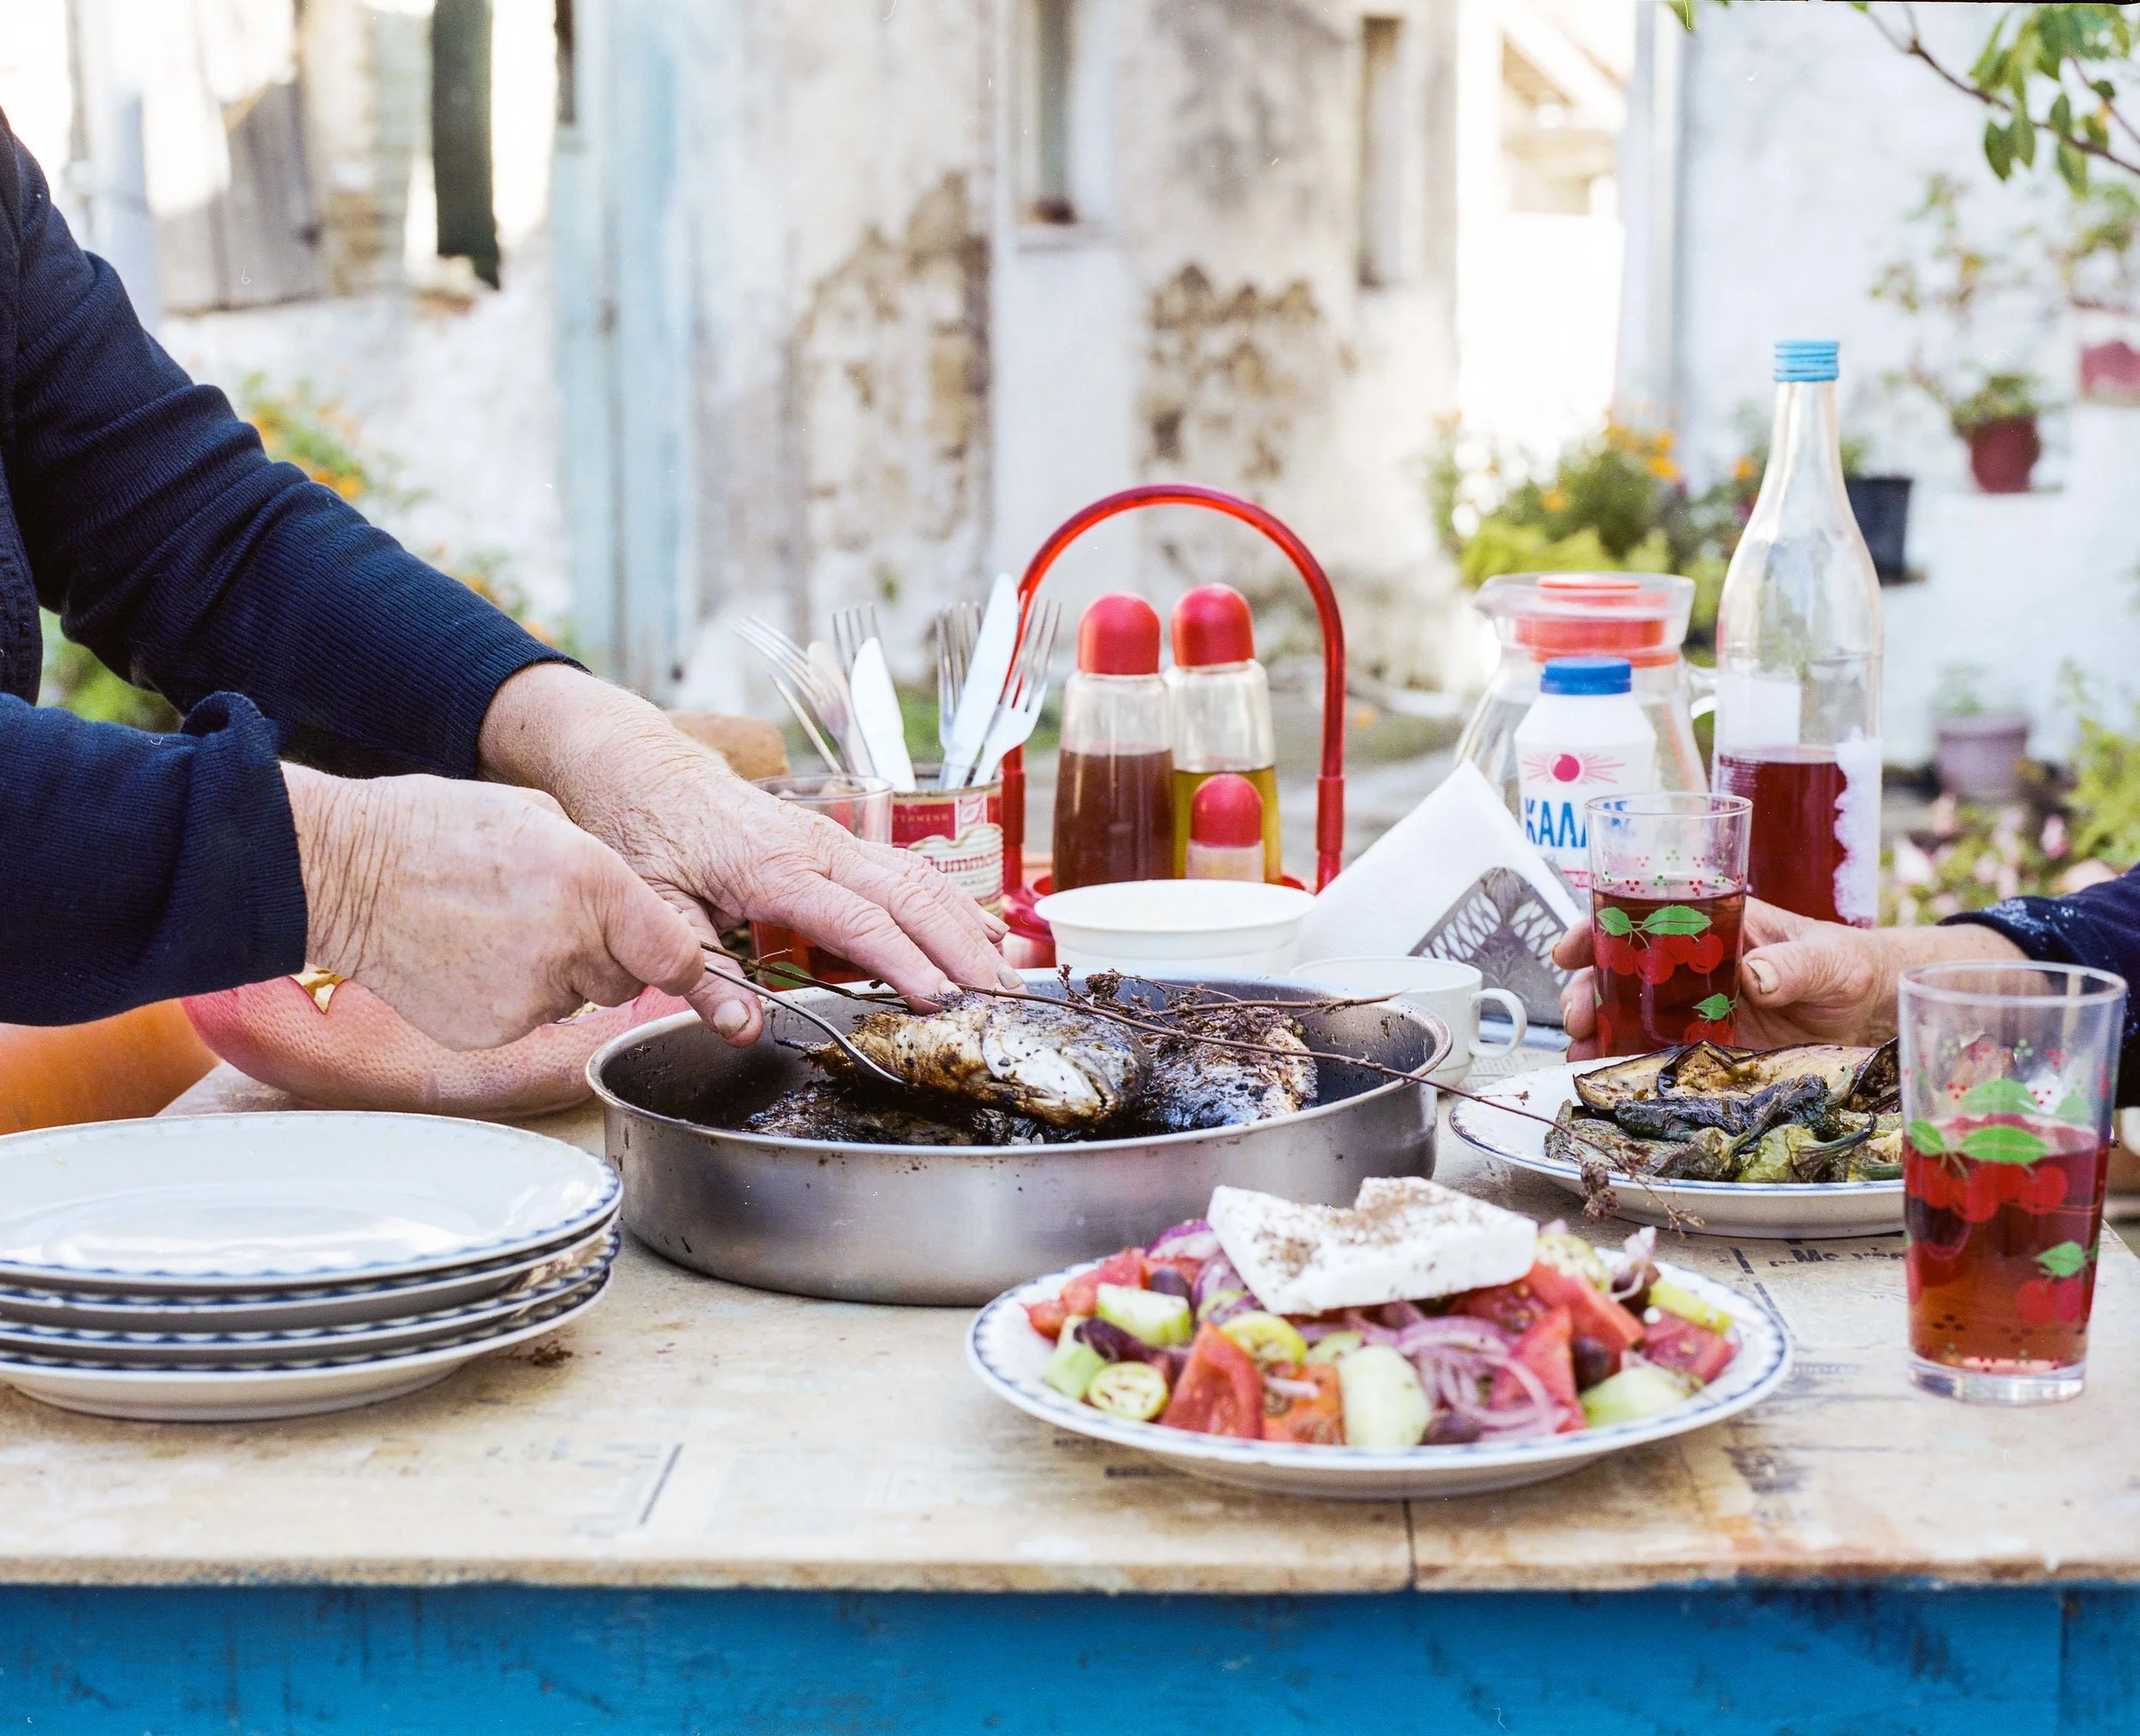
GRAND DISHES SPENDS A DAY WITH EACH GRANDMOTHER, CAPTURING RECIPES THAT HAVE BEEN PERFECTED OVER A LIFETIME.

Mualla's Turkish Helva
“Everybody here makes helva but my grandchildren say no one does it like me. They always get upset that I might not be telling them something top-secret in the recipe.'“
The very last in our gaggle of grannies but certainly not least, Mualla in Istanbul book-ended our three years around the world, cooking with grandmothers for the book. It makes sense then, after a book rich in recipes and wisdom, that she made us the ultra-light, ultra-comforting semolina helva.
The day we cooked with Mualla it poured but that mattered very little. Having been welcomed into such a warm home packed with women all eager to share the culinary delights of Istanbul, we revelled in the now well-known high that comes with the sharing of special recipes across generations. We downed sweet tea looking over the Bosphorus. We danced to ‘Hey Mambo, Mambo Italiano’, Mualla – despite being unsteady on her feet at the ripe age of 92 – leading the charge.
Our days with Mualla and her granddaughter Zeynep will have a lasting impression. Their readiness to fling their doors and arms wide open to us, show us around their city and introduce us to friends, family and favourite foods is one that has been echoed throughout the process of making this book.
The immense hospitality, kindness and openness of those we cook with never cease to surprise us. It has been an affirmation that there is value in what we are doing, that these dishes are more than a quick feed. They are the very embodiment of a full life. They are loaded with memories, feeling and the most precious things that life affords us: time and love.
Anneanne Mualla’s Turkish Semolina Pudding (Helva)
(Feeds 8–10)
Ingredients
450g sugar, caster or granulated
250g unsalted butter, kept as a block
650ml water
500g semolina, coarse or fine
25g pine nuts
Method
In a medium pan, put the sugar, butter and water over medium heat. Bring to the boil slowly to melt the butter and dissolve the sugar. When it turns bubbly and smells milky, turn off the heat.
Meanwhile, take a non-stick pan with a lid and tip in the semolina and pine nuts. You’re going to dry-roast the semolina on a medium heat, stirring at all times so it doesn’t burn. You’ll know when it’s ready because you’ll smell it toasting, and it will start to go golden and the pine nuts will take on a slight pinkish hue. This will take about 30 minutes (yes, that long).
When the semolina is nearly ready, reheat the butter mixture, then pour it slowly into the semolina pan (Mualla asked her granddaughter to pour while she stirred). Stir well to make sure it’s combined, then let it bubble and settle before turning the heat off. Put the lid on and leave to stand for 10–15 minutes, until the liquid is absorbed. Every 5 minutes or so, stir to check it hasn’t got too solid, breaking up the mixture. It should be dry enough for you to fluff up nicely with a spoon or fork.
Serve warm in bowls with a sprinkle of cinnamon – and a scoop of vanilla ice cream if you like.


Betsy's Mexican Chicken Tostadas
“My mother would make tingas de pollo and I loved it so much I’ve been making it for many years. My granddaughters now have also taken a liking to it, so it’s a classic dish I always cook for the family. It’s so simple but very full of flavour and goodness.”
On the odd occasion we’ve been privy to grandmothers cooking with their own grandchildren, witnessing the passing-on of skills, recipes and traditions from withered, wrinkled hands to tiny ones not yet trusted to hold a knife alone. Such was the case at Betsy’s in Mexico City.
With the patience of a saint, Betsy took to the chopping board with seven-year-old Bella to chop an onion, teaching her how to take proper hold of a knife, the technique she uses to slice and finely dice. One deft move for her, a great deal of concentration for Bella. Still, it has taken Betsy a lifetime to perfect. What struck us was the gentleness with which grandmother taught granddaughter, a willingness to spend time that perhaps parents aren’t lucky enough to afford their own children.
We ate for hours, alternating between rice and crispy tostadas as a base for our spicy chicken and spoonfuls of black beans, no real rush to leave the table. It was here that we learned the term sobremesa, the ultimate dining experience, in which Mexicans hang out at the table from lunch until dinner, filling the space between with leftovers, snacks and conversation.
Abuela Betsy's Mexican Chicken Tostadas (tingas de pollo)
(Feeds 4-6)
Ingredients
1 tsp olive oil
½ large onion, diced
2 garlic cloves
4 chicken breasts
8 soft tortillas (preferably corn), cut into small discs
200g cottage cheese or sour cream
For the sauce
7 plum tomatoes, chopped into quarters
½ large onion, roughly chopped
4 garlic cloves, roughly chopped
2 chipotle chillies from a tin, or 2 tsp chipotle paste
1 tbsp olive oil
1 onion, cut in half and sliced into half-moons
For the refried beans
1 tsp olive oil
½ large onion, diced
2 x 400g tins black beans
Method
Put a medium-sized pan on medium heat and add the olive oil. Soften the onion and garlic, about 8 minutes, and add the chicken breasts. Stir and brown a little.
Add a pinch of salt to the pan and follow with enough water to just cover the chicken. Put the lid on and cook for around 40 minutes. Skim off any foam that gathers on the top.
Meanwhile, make the sauce. Pulse the tomatoes, onion, garlic and chipotle chillies or paste in a blender – do it in two batches if you need to, adding a little water if necessary. The result should be thinner than a smoothie, more like a spicy tomato juice.
Heat the oil in a non-stick pan. Hold a sieve over the pan and pour the tomato sauce in. Use a spoon to push the sauce through the sieve to remove skin and seeds. Add the sliced onion, season to taste, stir and let simmer for 20 minutes.
While the chicken and sauce both simmer away, start preparing your tostadas. Use a cookie cutter to cut discs, around 8–10cm, out of your tortillas – as many as you can. Lay out on a baking tray and brush with olive oil. Set aside and turn the oven on to 200°C/180°C fan/gas 6.
When the chicken is done, remove it from the water. Leave until cool enough to handle, then shred and add to the sauce.
For the beans: soften the onion in the oil in a medium saucepan for 8 minutes on a medium heat, then add the beans and their liquid and bring to the boil, then lower to a simmer for 20 minutes, stirring occasionally, until liquid has reduced a bit.
Once the beans are soft, remove from the heat and use a potato masher to mash the beans until smooth and creamy. Taste and season – and don’t worry if the mixture is a touch runny, once you’ve left it to cool slightly the beans will thicken more.
While the beans cook, pop the tostadas in the oven for 8 minutes, or until crisp and slightly golden.
Transfer everything to serving dishes and lay out for your guests to assemble: smear a tostada with refried beans, followed with a spoonful of chicken and topped with a dollop of cottage cheese or sour cream (Betsy uses panella cheese or queso fresco).


Tish's California Sunshine Salad
“The secret of good salad dressing is mixing. You should mix your dressing really well before it goes on, rather than dress with each individual ingredient at the end. I love the jammy part of this dressing at the end, when it all comes out. It’s just a little treat on this very healthy dish.”
It was on the Los Angeles leg of our five-week road trip across the USA that we had perhaps the most (and only) terrifying granny experience. We had a run-in with Skid Row – an apocalyptic portion of LA – 50 blocks of homeless people living in tents, and we’d decided it was a good idea to just ‘nip through’. It didn’t seem so big on the map, Iska had pointed out. It was.
Ironically, two homeless grandmas, aggressively shoving shopping trolleys towards us, began to chase us down the street. ‘I’m gon’ get me a new bag,’ they cackled. We were the only people stupid enough to have walked down there. They meant our bags.
We managed to outrun them – only just. In need of a beer, we zipped up to a hotel roof garden, where we met Alexa, who by some miracle turned our day around. Luck would have it that her mother, activist Tish, is a grandma – and a keen cook. Within a few hours, we were en route to Hollywood to rustle up an insanely colourful salad with Tish, who whisked us through her protest-reportage photography between blanching asparagus and expertly slicing at every vegetable and fruit known to man.
Jeune Tish’s California Sunshine Salad
(Feeds 4)
Ingredients
handful hazelnuts
bunch asparagus, woody ends removed
1 x 70g bag rocket
1 butter lettuce, torn
½ red pepper, sliced into thin pieces
150g peas (fresh or frozen peas cooked and dunked in cold water)
12 mixed cherry tomatoes, halved
1 avocado, peeled, stoned and sliced
4 or 5 radishes, finely sliced
1 grapefruit
1 tangerine
handful raspberries
For the croutons
1 demi-baguette, sliced into 1.5cm rounds
2 garlic cloves, crushed
2 tbsp olive oil
For the dressing
1 tsp raspberry jam
juice of 2 limes
5 tbsp olive oil
2 tbsp balsamic vinegar
pinch Himalayan salt
Method
Preheat oven to 180°C/160°C fan/gas 4. First, make the croutons: take your slices of baguette (if you bought a big one, cut the rounds into halves). Mix the garlic and olive oil into a bowl with a pinch of salt and brush or rub this onto the bread. Put on a tray in the oven to toast for 15–20 minutes, rotating the tray halfway through, until golden.
At the same time, pop the hazelnuts on a baking tray and put them in to toast for 4–5 minutes. Set a timer and make sure they don’t catch.
Next make the dressing: in an old clean jar put all the dressing ingredients and shake to combine, then set aside.
Steam the asparagus in a pan with a lid and a little water for 4–5 minutes, keeping them al dente. Set aside.
Prepare all the veg and citrus fruit. Slice the top and bottom off the grapefruit and tangerine to start segmenting. Place the flat edge on the chopping board and cut the skin off the sides, then cut along the edge of each segment to extract them, trying to lose all the pith.
Find a big serving plate and start building up the salad, starting with the butter lettuce, with the asparagus around the edge pointing out like sunrays. Fill the plate with all the fruit and vegetables however you like, add the croutons and drizzle over the dressing.


Irma's Tex-Mex Tacos
“In Texas we tweak the traditional Mexican dishes because of the abundance of cattle. There’s so much beef that there’s no escaping it in our cuisine. We still consider this to be Mexican because in spite of growing up in Texas, we were raised Mexican and that means making one small meal go a long way.”
We went to track down Irma at her eponymous Tex-Mex restaurant, Irma’s Original. The sign outside read ‘Comida como en su casa’ – food just like at home. The restaurant was in a parking lot in central Houston with corrugated walls, Bud Light signs and Mexican wind chimes. Inside was packed with people dipping tortillas, downing margaritas and forking beautiful combinations into taco shells.
The tables were covered in a mad assortment of plastic covers, from snakeskin to bright floral to leopard print. Baseball memorabilia, photos of Irma winning prizes, neon signs and trinkets lined the walls and one room was entirely festooned with Christmas lights – a flashing web across the whole ceiling. This is Irma’s bold, fun style, which was confirmed the following day at her own home.
Irma was firm, sure and matter-of-fact, which perhaps comes from raising kids and running a successful business on her own. There was a team of great women behind her, two of whom were there to help prep the immense Tex-Mex feast. We could have sat and clinked lime-plugged Coronas with Irma and her pals all night.
Grandma Irma’s Tex-Mex Tacos
(Feeds 4–6)
Ingredients
1 tbsp rapeseed oil
400g (14oz) minced beef
1 tsp ground cumin
2 garlic cloves, finely chopped
1 green chilli, chopped (Irma uses a similar native chilli called serrano)
1 small carrot, diced into 1/2cm (1/4in) cubes
1 floury potato, diced into 1cm (1/2in) cubes
1 small onion, peeled and quartered
1 green pepper, roughly chopped
1 red pepper, roughly chopped
1 fresh tomato, diced (optional)
2 spring onions, chopped
1 x 400g (14oz) tin chopped tomatoes
1 tbsp tomato purée
1 handful fresh coriander, chopped, plus extra to serve
8 traditional Mexican corn tortillas, 4 soft corn tortillas (to make your own) or 8 pre-made hard taco shells
vegetable oil, for deep frying, if needed
Method
In a large pan heat the rapeseed oil over a medium flame and put the minced beef into the sizzling oil. Break up the meat with a wooden spoon while it browns for a few minutes.
Once browned a little all over, season generously with sea salt and freshly ground black pepper. Reduce the heat slightly and stir in the cumin, garlic and green chilli.
Next add the veg: the carrot, potato, quartered onion, peppers, fresh tomato and spring onions. Stir to combine.
Empty the tin of tomatoes into the pan followed by half a tin of water and the tomato purée. Stir again, taste and season more if it needs it, cover with a lid and cook for 20 minutes. When the time is up, throw in the handful of coriander and leave to cook for a further 5 minutes.
To make the tacos, Irma put soft 15cm (6in) corn tortillas into a pan of hot oil, pushed down the middle of the tortilla with a fork and cooked until golden to make it into a folded taco shape for piling filling in. Try this yourself with the larger soft tortillas you can buy in the UK or use shop-bought hard taco shells and add your beef filling. Irma served hers with guacamole, rice, beans and salsa.

Tootsie's Beef Stew
“My husband loved beef stew. It was something he would like if I cooked it all day and the meat would just fall apart. We’re big beef people in Texas. When I was caring for my husband, I’d have to take him to see his cattle every day. Oh boy, he loved his cattle.”
Having found her number through the famous barbecue smokehouse she works for in Texas, after weeks of trying to get hold of her, we called Tootsie, huddled around a phone we’d put on loudspeaker. The line was not at all great. ‘Hello?’ barked a gruff voice, more demanding than enquiring. We dived into explaining that we’re two British girls on a mission to share recipes from grandmothers all over the wo— ‘WHO may I ASK is SPEAKING?’ the voice bellowed in a thick Texan slur. A quick exchange of glances. Then we tried again.
Eventually, over a painful five minutes and excruciatingly temperamental phone line, we were told to go to Snow’s BBQ in Lexington from 5 a.m. on a Saturday. Any Saturday? She had already hung up. So, weeks later, as we drove through lush fields dotted with cattle to small-town Lexington, we were perhaps more nervous than we have ever been when meeting a grandmother for the first time.
We needn’t have worried. Tootsie had been up since 2 a.m. smoking brisket over hot coals. Snow’s BBQ is famous all over the USA and octogenarian pitmaster Tootsie is its biggest draw. Hundreds of people drive from all over Texas to try her brisket. At Snow’s, she’s a celebrity, constantly in demand and forever being photographed by fans. In spite of all of this, she still gave us her full attention, sharing her prime brisket with us, taking us through her favourite beef stew recipe and opening up so honestly about her life, the death of her husband, and how her love of work will keep her going for years to come. Her bark, it seems, was much worse than her bite.
Mawmaw Tootsie’s Beef Stew
(Feeds 4)
Ingredients
3 tbsp olive oil
2 large red onions, each cut into 8 wedges
3 carrots, peeled, halved lengthways and cut into 2cm pieces
3 red potatoes, peeled and roughly chopped into 2cm cubes
3 tbsp plain flour
2 tsp salt flakes
2 tsp cracked black pepper
700g braising beef, diced
4 sprigs fresh thyme
1l beef stock
handful fresh parsley, chopped (for garnish)
Method
In a heavy casserole pan, heat 2 tbsp of the olive oil and fry the onions for 10 minutes until starting to brown.
Add the carrots and potatoes, and cook for 5–10 minutes until colouring a little.
Meanwhile, mix the flour, salt and pepper together. Sprinkle over the beef cubes and toss so they’re lightly coated.
When the vegetables look slightly caramelised at the edges, remove them from the pan and set aside. Add the remaining tbsp olive oil.
Brown the beef in two batches, making sure it gets some good colour on all sides.
Return all the beef and all the vegetables to the pan; add the thyme and stock.
Bring to the boil and then simmer with the lid on for 2½ hours, or until the beef is falling apart.
Remove the lid and cook uncovered for the last 20–30 minutes so the sauce thickens. Season to taste and serve with crusty bread and a sprinkle of parsley.


Helen's Barbecue Sides
“I’ve been developing a top-secret BBQ sauce recipe for 20 years. I can’t disclose that at all, but you’re welcome to my beans, coleslaw and potato salad. I’ve been here for 23 years. I never cook at home. I just cook at my barbecue smokehouse.”
We drove two hours from Nashville to Helen’s in Brownsville to catch her in pre-lunch preparation mode. On a very grey day we drove through the middle of endless cotton fields; spiky brown branches with bright white tops, a little darkness lingering behind their fluffy exterior.
Helen’s ‘Bar-B-Que’ is operated from a 100-year-old dark red wood-panelled shed in the middle of a parking lot. She’s one of the few female pit-cooks in the country and by lunchtime trucks were whipping into the lot for her pulled pork and coleslaw, baloney sandwiches and beans. What looked like the smoking remnants of an arson attack was actually Helen’s pit room, built onto the back of the shed. The room was entirely filled with smoke; you couldn’t see 30cm in front of you and we were all crying immediately, Helen with a little more composure.
Inside resembled a David Lynch set; dark wood veneer and daylight filtering through dust to land on the ketchup and salt. Helen was behind the serving hatch, pushing white cabbages through the blender with a characteristic grit.
Various family members came through the kitchen swing door during the morning: her niece, to ask for money (to no avail); her cousin, to peel potatoes in exchange for a can of Coke; her daughter, to serve at the hatch for a bit. The meat was smoky and delicious, paired with her signature sauce. There was a mild or spicy barbeque sauce, and we were absolutely not allowed to know the recipes for these.
Helen’s barbecue sides
Feeds 4
Ingredients
For the baked beans
1 tbsp olive oil
1 small onion, finely diced
4 rashers streaky bacon, finely diced (Helen uses offcuts of pulled pork)
1 green or red pepper, finely diced
2 x 400g tins pinto beans, drained
1 x 400g tin chopped tomatoes
1 tbsp brown sugar
2 tbsp Worcester sauce
1 tsp salt
1 tsp smoked paprika
For the coleslaw
½ white cabbage, finely shredded
1 large carrot, shredded or grated
100g mayonnaise
2 tsp yellow mustard
1 tbsp white wine vinegar
1 tsp caster sugar
For the potato salad
1 egg
500g waxy potatoes, peeled and cubed
1 stick celery, finely chopped
5 small gherkins (or 2 big), finely chopped (plus some juice)
80g mayonnaise
1 tsp yellow mustard
3 spring onions (optional)
Method
To make the beans: preheat oven to 190°C/170°C fan/gas 5. Heat oil in an ovenproof casserole over a medium-high heat. Sauté the onion for 5 minutes until it begins to soften, not brown.
Add the bacon and diced pepper and cook and stir until bacon is browned, 7–10 minutes more.
Tip in the beans, tomatoes, sugar, Worcester sauce, salt and smoked paprika. Transfer the pot to the oven with the lid on and bake until bubbling and browned, about 1½ hours. Return to the top of the stove and reduce without the lid until sticky and resembling baked beans as we know! While they cook, prepare your slaw and potato salad.
To make the slaw: combine the cabbage and carrot in a large bowl. In a separate small bowl or jar, mix the mayo, mustard, vinegar, sugar and a pinch of salt to make the dressing. Pour over the cabbage and carrot and pop in the fridge until needed.
To make the potato salad, put the egg on to hard boil, about 8 minutes. Once the egg is done, remove with a slotted spoon and run under the cold tap. Keep the egg pan boiling and add the potatoes for 7-8 minutes, or until tender. Drain the potatoes and place in a mixing bowl.
Peel and finely chop the egg and add to the bowl of potatoes, followed by the celery and gherkins.
Mix the mayonnaise and mustard together with 1 tbsp gherkin juice in your dressing bowl or jar. Pour over the potato mixture and stir gently but thoroughly to combine. Add spring onion if you like. Keep in the fridge until needed.
When the beans are ready, serve with the slaw and potatoes and partner with pulled pork and BBQ sauce.

Westelle's Pecan & Cranberry Muffins
“I think I learned this recipe from a neighbour, but it must have been way back in the 1950s that I first baked these muffins. I have things in my kitchen that are over 50 years old – my cake mixer, for example. I believe in holding on to things when they work good.”
The day before we met Westelle, we were in Nashville with two broken cameras and managed to track down a Canon specialist. The Canon specialist was Gary, and while he didn’t manage to fix the cameras, he fixed us up with his mother Westelle, muffin maker extraordinaire. The following day Gary collected us in his red Jeep and we drove out into the hills between the November trees in an incredible palette of yellow, orange and red, in and out of small towns, past enormous churches and most notably a sign praising ‘The Lord, family, friends and chicken nuggets’.
Westelle was waiting at the door, a tiny figure behind a billowing American flag, make-up done and hair set. Family photographs and cross-stitched quotes covered every inch of the bungalow she designed with her late husband. A copy of To Kill a Mockingbird was poised beside the toilet on a spotless marble dresser, her fridge was so large she could have hung out inside it, and her hand whisk was from 1981.
We sat on her counter as she whisked flour, buttermilk, sugar and an entire box of Raisin Bran, saying, ‘Well, ain’t you girls precious?’ and talking of princes William and Harry as if they were family. Her hands were so arthritic but she didn’t complain. ‘I’ve had a good life,’ she said, and we welled up at her admittance, that at 92, it’s almost all up. Still, she was determined that we come back for Thanksgiving because she was hosting and cooking for 20. Power to Westelle.
Pecan and Cranberry Buttermilk Muffins
Makes 12
Takes 45 minutes, plus cooling time
Ingredients
115g butter, softened
250g caster sugar, plus 3 tsp for sprinkling
120ml buttermilk (you can use regular semi-skimmed)
2 eggs
250g plain flour
½ tsp salt
2 tsp baking powder
50g dried cranberries
50g pecans, chopped
2 handfuls bran flakes
Method
Line a 12-hole muffin tin with 12 large muffin cases and preheat oven to 190°C/170°C fan/gas 5.
In a large mixing bowl, cream the butter and sugar together until light and fluffy, then add the buttermilk.
Add the eggs one at a time, beating well after each addition.
In a separate bowl, sift the flour, salt and baking powder together, then fold this into the buttermilk mixture to make a smooth batter.
Next, fold the cranberries, pecans and bran flakes into the batter. Squeeze the bran flakes as you add them, breaking them up a little.
Divide the batter between the cases and sprinkle the tops with the extra sugar. Bake for about 20 minutes until golden and risen. A skewer inserted into the centre of a muffin should come out clean.
Remove from the oven and transfer the muffins to a wire rack to cool for at least 30 minutes before eating.

Darcelle's Icebox Pie
“I learned to make this back when I was a teenager, from my mother. My momma would put this in an icebox when the summers would be long and hot here. That was before we could afford a refrigerator. It’s no baking necessary and actually one of the easiest desserts to pull together.”
We met Darcelle’s daughter Kiki in a hotel we were staying at in Nashville. She worked there and we got chatting. Soon enough, we were video calling Darcelle to beg and plead she take us in for an afternoon of pie making. She graciously agreed.
We had no idea we’d be crashing a birthday party when we invited ourselves over. Darcelle’s great-grandbaby was celebrating her third birthday on the day we’d cornered her into sharing her special recipe with us. So into Candyland we went, a kitchen completely covered in giant papier-mâché sweeties and dotted with pastel-coloured balloons.
Grandkids and great-grandkids emerged from various rooms of the apartment as we rolled up our sleeves and rolled lemons underfoot. Still, the chaos didn’t seem to bother Darcelle one bit. She whipped this icebox (fridge) pie up for us in barely no time at all between breaking up fights, placating crying babies and reassuring hormonal teens. All in a day’s work for this granny.
Lemon Icebox Pie
Feeds 8–10
Takes 20 minutes, plus 2–3 hours chilling
Ingredients
70g butter, plus extra for greasing
300g Hobnobs or digestives (Darcelle uses graham crackers, if you can find them)
2 tsp cinnamon
1 tsp salt
For the filling
4 lemons (zest of 2 and juice of all 4)
2 x 397g tins condensed milk
Method
Grease a 25cm loose-bottomed tart tin with a little butter. Melt the rest of the butter gently in a pan and set aside.
In a food processor, blitz the biscuits until ground but not powdery.
Tip into a mixing bowl and add the cinnamon and salt. Stir the butter in well.
Transfer to your prepared tart tin, pressing into the bottom and most of the way up the sides. Put in the fridge for 1 hour to set. Don’t be confused by the ‘icebox’ title, this pie is set in the fridge.
Meanwhile, make the filling. Combine the lemon zest and juice in a mixing bowl. Add the condensed milk and stir well to combine. As you stir the lemon will thicken the condensed milk.
When the biscuit case has firmed up, remove from the fridge and pour this mixture into it, distributing evenly with a spatula or the back of a spoon. Put the whole thing into the fridge for 2–3 hours until set.
Gently remove the icebox pie from the tin and put onto a plate (you could dust it with a little more cinnamon or grate over a little more lemon zest, if desired, to decorate). Slice the pie with a warm knife to make a clean cut and serve with squirty cream.

Sharon's Shrimp Stew
“We make this stew because it makes sense in this part of the world. People come here to Hatteras from all over to fish. I crave a clam and a shrimp more than I ever have a fried pork chop or a hamburger.”
Our great-granny USA road trip officially kicked off in North Carolina’s Outer Banks, with us driving past sand dunes and beach oats billowing in a warm breeze (because summer was just wrapping up on the Atlantic coast). We’d been tipped off on a local cooking hero, grandmother Sharon, who lives in a hurricane-battered home that has withstood 60 years of wind thrashings.
Its very beams were once trodden by sailors doomed to meet their end at Diamond Shoals – the most eastern point of the USA at which two deadly currents clash – only 10 minutes from Sharon’s home.
‘You just batten down and make sure as hell you have some potatoes, onions and a burner to cook with – it ain’t scary at all,’ is her reaction to the extreme weather she faces each year. Her stew included a ‘bread pie’, which is essentially chopped-up bits of bread dough cooked in broth to become flat, tender and chewy dumplings that serve to thicken the soup and add warmth to this hurricane-defying dish.
In typical fashion of people from the south, Sharon welcomed us with warm, wide arms. We relished gulping down her intelligent insights on life as much as the sweet iced tea on her back porch. We talked politics, philosophy and love as we crowded over her stove to cook up stewed shrimp, caught fresh on her doorstep that day.
Shrimp Stew with ‘Pie Bread’
Feeds 4
Takes 40 minutes
Ingredients
3 tbsp olive oil
500g shelled king prawns
4 waxy red potatoes, skin on and cut into 2cm cubes
½ large white onion, diced
1 tsp sea salt
2 spring onions, chopped
For the pie bread
120g plain flour
1 tbsp butter
For the pickled lettuce
1 romaine lettuce, finely shredded
100ml cider vinegar
100ml water
Method
Start with the pie bread. Combine the ingredients in a bowl, rubbing the butter into the flour with your hands. Season with salt and pepper and slowly add cold water a tiny bit at a time (around 60ml). Mix as you go and stop adding water when the flour firms up and comes together into a ball, but isn’t sticky or wet. Knead for 1 minute and set aside with a tea towel over the top of the bowl as you prepare the rest.
Next shred your lettuce and mix in a bowl with the vinegar and water. Set aside in the fridge to pickle.
Now for the stew; place a large pan over a medium heat with the olive oil (enough to cover the base of the pan) and cook half of shrimp until pink and perhaps turning slightly golden at the edges. Remove with a slotted spoon and set aside.
Put the second batch in the same pan, cook for 1 minute and add the potatoes, onion and sea salt along with a sprinkling of pepper. Pour in enough water to cover all the ingredients, bring to a boil, reduce to a simmer and cook for 10 minutes, or until the potatoes are almost tender.
While the stew cooks, return to the pie bread. Dust a clean surface with flour and roll out your dough 3mm thick. Cut the dough into 3cm squares.
When the stew has cooked for 10 minutes, lay the pieces of pie bread into the pan, cover and cook for 15 minutes on a very low heat, stirring occasionally, until the pastry is tender and puffed and the stew has thickened slightly. Top up the broth with water if it’s not soupy enough for you.
Ladle into bowls, drop in the tender prawns from the first batch and sprinkle with spring onion. Serve the pickled lettuce on the side. We had ours with Sharon’s iced tea.


Hakima's Aubergine Salad
“Where I’m from, we don’t ever serve just one dish. We really lay on a feast for you. This eggplant salad is just a tiny part of a huge feast I would make for guests.”
We met Hakima on Staten Island in New York. She is one of the guest grandmother chefs at the restaurant Enoteca Maria. Every lunch a different grandma ‘pops up’ in the open kitchen here to cook the cuisine from their home. She was remarkably relaxed, happy to be interviewed while juggling multiple pans of curry, couscous and this aubergine salad; rich, sweet and devoured by us very quickly.
Eggplant Zaalouk
(aubergine salad)
Serves 5 or 6
Ingredients
2 large aubergines
2 large tomatoes diced
4 cloves garlic
1 tsp Tomato paste
2 tbsp chopped parsley
2 tbsp chopped coriander
1 tsp cumin
Half tsp paprika
Half tsp ginger powder
Pinch turmeric
Chilli powder to taste
Method
Peel the aubergines and cut into small 1x1cm cubes
Put a pan onto the heat with a glug of olive oil and pinch of salt and cook the aubergines with the lid on for about half an hour until soft
Add the two chopped tomatoes and tomato paste
Grate in 4 garlic cloves and add all the herbs and spices plus a sprinkle of salt and pepper
Cook for a further 10-15 until the mixture is thick but not dry - test seasoning and leave to cool a bit and the flavours to deepen.
Serve warm or cold with khobz bread or pitta.

Maral’s Azerbaijani Stuffed Vine Leaves (Dolma)
“I now bring so much back with me from Azerbaijan. It’s so important to have the ingredients I know and love from my home.”
Jet-lagged but wide-eyed at all there was to take in in New York, we hopped on the subway from Manhattan to Brooklyn to be welcomed into a small apartment by a lady with a big heart. She swung open the door to her home and exclaimed, ‘What beautiful girls,’ before demanding we glug tea (foraged herbs from her native mountain home, including wild mint and dried roses) and guzzle down a lavash she’d just whipped up.
The lavash, a sort of bread pocket filled with herbed meat, which resembles a flattened calzone, is what Maral describes as a ‘snack’ – but we were full after sharing just one. While we ate, she moved. She danced around her teeny kitchen for four hours, chopping up, whizzing up, rubbing in, marinating, bubbling and stirring until we were seated at a table laden with far too much food for three.
We ate: lamb dolma, which Maral got us to prepare, sticking our tentative hands into a great bowl of meat, chopped onions and herbs, before we extracted small balls of it to wrap in wet vine leaves. Also on the menu were peppers and tomatoes stuffed with lamb and fresh bread, rolled and griddled just moments before we dined. This was all swilled down with vodka, the climax of our afternoon being an Azerbaijani dance-off in the living room. Hours later, we escaped into the cool winter air of Brooklyn, our cheeks flushed and our hearts as full as our stomachs.
‘Don’t stay in a hotel and spend your money; next time, you stay with me,’ she said, waving us off.

Feeds 4–6
Takes 1 hour
Ingredients
250g lamb mince
250g beef mince
1 medium onion, finely chopped
1 small potato, finely diced
2 tbsp fresh dill, chopped
2 tbsp fresh coriander, chopped
1 tsp paprika
30-ish vine leaves
½ quince or one small apple, roughly chopped
2 garlic cloves, peeled
Method
Place the meat, onion, potato, herbs and paprika in a bowl. Season and combine with your hands.
Take your vine leaves one by one and put a small ball of meat mixture in the bottom part of the leaf. Then, starting from the right-hand side and working round, fold the leaf in on itself until it covers the meat.
Place the finished stuffed leaves into a saucepan as you go, packing them so the leaf is secure and won’t unwrap.
When they’re all done, place the quince or apple pieces and garlic on top. Add cold water halfway up the saucepan and turn the heat up high until it comes to the boil. Then lower the heat to a simmer and cook for 30–40 minutes, until cooked though.

Jean's Jamaican Ackee and Callaloo with steamed vegetables
“This is a traditional Jamaican dish that instantly takes me back. It takes me back to that island and to the smells that hit you over the head coming from people’s homes.”
We were connected with Jean through a Caribbean society where she’s known for her wonderful food. She is also known for her culinary skill at church on Saturdays, and spends a lot of the week busily preparing for various events, so we were very lucky to get a whole afternoon with her.
As the date approached, we rang a couple of times to check that we were still on, which seemed to miff her – that we might assume she’d forget. This is very Jean; calm, cool and patient with a serious wit and no time for fuss or idle gossip. She just likes to get things done. She was incredibly wise and considered in all she shared with us.
We fiddled around photographing the food in her living room, as it had the best light. She left us undisturbed, which is unusual, as often the concept of ‘food styling’ seems ridiculous to our grandmothers, plus they worry it’s going to go cold.
She called us ‘babes’ as we left her house and we responded with a loud, ‘Bye babes!’ in unison. We all promptly cracked up at the relaxed conviviality of it all.
Feeds 4
Takes 35 minutes
Ingredients
400g cassava, peeled and chopped into large chunks (see method)
500g piece yellow yam, peeled and chopped into large chunks
1 sweet potato (about 400g), peeled and chopped into large chunks
400g pumpkin, skin on and chopped into large chunks
1 tbsp olive oil
1 red onion, peeled and diced
1 large tomato, chopped
1 vegetable stock cube, crumbled
½ tsp cayenne pepper
1 x 540g tin callaloo
1 x 540g tin ackee
Method
Set up a large steamer pan on the hob in preparation. Peel the skin off the cassava by using a sharp knife to chop it into 15cm rounds, then take each piece and lay the flat side onto the chopping board and slice downwards along the edges to remove the skin. Once peeled, chop into large chunks.
Add the peeled and chopped cassava, yam and sweet potato to the steamer pan for around 20 minutes, until tender. After 5 minutes of steaming, add the pumpkin.
Meanwhile, heat a lidded sauté pan with the oil, add the onion and soften for 8 minutes before stirring in the tomato for a minute or two.
Next add the stock cube and cayenne pepper, stir, and add the callaloo; cook for 5 minutes with the lid on.
Next add the ackee. Jean carefully stirs hers with a fork rather than a spoon from now on, so as not to break up the ackee. Cover and let it simmer for 5–10 minutes.
Check the steamed vegetables and if a knife goes through them easily, stop cooking – you don’t want them to disintegrate.
When everything is done, serve the steamed vegetables with the ackee and callaloo.
TIP: You can use finely chopped fresh spinach or tender spring greens as a substitute for callaloo, or for a non-vegan version swap it for saltfish.
Jean also added one tbsp of annatto paste (spooned from a mysterious unlabelled jar in her fridge!) for colour and for its many health benefits. Annatto (also called achiote) is a seed that grows in Jamaica and can be found as a powder or paste. Add if you can track it down!


Chula's Thai Salmon Panang Curry
“Most people in Bangkok eat beef and pork Penang but I prefer fish. That’s why I am making you salmon panang. I tested all different kinds of fish like plaice and halibut for this recipe but salmon is the best.”
We were connected with Chula – full name Chulalaxana Varanand Chudadhuj – through a very helpful and witty man at the Anglo-Thai Society, who, upon proposing Chula, offered, ‘If not right, I can try and seek out another innocent potential victim.’
She was more than right: exquisitely presented and very good fun. As soon as our coats were removed we were offered a glass of Moët, which we just managed to delay until the cooking was finished. Which was not long, because this curry is incredibly speedy to make. With the ingredients ready laid out, it took under 15 minutes.
The house was full of colour, with Chula’s oil paintings all over the walls, her 1990s stereo in the corner and accompanying pile of ‘sentimental love’ CDs just beside it. There were hanging glass flower lampshades, coloured candles, decorative crockery and wall-mounted plates that she’d découpaged herself.
The interview evolved and deepened as the champagne flowed. She was incredibly open and generous, with her advice, her fears and her food. Once done with mains, she disappeared with the plates and returned with a warm bowl of chopped banana blasted in the microwave with coconut milk – aka a hug in a bowl. We departed with bubbles, panang and newfound wisdom running through our veins.
Feeds 4
Takes 25 minutes
Ingredients
1 tbsp coconut oil
2 tbsp panang curry paste (found in Thai supermarkets)
4 skinless salmon fillets
1 x 400ml tin coconut milk
1 tbsp coconut palm sugar
2 tbsp fish sauce
handful fresh Thai basil, leaves picked
2 red chillies, sliced into thin slivers
Method
Put a frying pan large enough to hold your 4 salmon fillets on to a medium heat and add the oil.
Add the paste and stir (if you like your curries a little hotter, add a touch more paste).
Put the salmon fillets into the pan and cook for a few minutes on each side.
Add half the tin of coconut milk, the coconut sugar and fish sauce. Stir until the paste is fully integrated and the sauce is smooth and well combined. Careful not to break up the fillets.
Allow to reduce for 5 minutes and add the rest of the coconut milk and a few basil leaves and cook for a further 5 minutes.
When the sauce has thickened, check for seasoning and carefully transfer the curry to a serving dish. Top with a garnish of sliced chillies and basil leaves and serve with basmati rice.

Tinh's Vietnamese Spring Rolls
“This dish is eaten in Hanoi where I’m from as street food. I even did it for my children’s packed lunches at school. The key is to use all the coriander, including the stalks because they hold the most flavour.”
Teeny Tiny Tinh. Probably of the smallest and most smiley of all the grandmothers we have cooked with and certainly the only granny covered in tattoos and wearing black Nike slides.
We found Tinh through her lovely daughter who runs Hanoi Cafe in London. When we met at her home, Tinh had her special Vietnamese knife in hand at all times. Watching her nip little pieces of carrot for the dipping sauce was highly satisfying. She prepared the rice paper and rolled the spring rolls with matching precision. After a few demonstrations we set up either side of her, wetting the rice paper until sticky and malleable enough to wrap the filling. Soon a large pile had formed and Tinh began the cooking process; straight into the hot oil to puff and crisp.
We ate from little bowls with noodles, salad and sauce, cutting the spring rolls in half with scissors for ease of eating. About seven spring rolls (each) and several hugs later, we left, Tinh blowing kisses in the doorway.
Cha Nem Hanoi
(pork and crab spring rolls with pickle salad)
Feeds 4-6 people
Takes 1 hour 15 minutes
Ingredients
For the salad
1 kohlrabi, peeled and julienned
2 large carrots (or 4 small), peeled and julienned
1 bunch coriander, stalks chopped into 2-3cm pieces
1 tbsp granulated sugar
1 tsp sea salt
3 tbsp rice vinegar
For the spring rolls
250g lean pork mince
100g crabmeat (one small tin)
2 small onions, finely diced
½ kohlrabi, peeled and finely diced
1 large carrot (or 2 small), peeled and finely diced
1 tsp granulated sugar
1 tsp salt
1 tbsp fish sauce
1 egg, beaten
3 tbsp rice vinegar
1 x 12 pack rice spring roll wrappers (22cm diameter)
For the dipping water (nuoc cham)
1 tbsp granulated sugar
1 small carrot, cut into very fine crescents (Ting takes slivers from the top, moving around to create pretty, tiny pieces)
2 garlic cloves, very finely sliced
3 tbsp rice vinegar
red birdseye chillies, very finely sliced (to taste)
Method
For the salad:
Prepare the kohlrabi and carrots and put them into a bowl.
Take the coriander stalks and add to the vegetables, saving the leaves for another dish. (Tinh says most of the flavour is in the stalks!)
Add the sugar, salt and vinegar and mix well. Place into the fridge until needed.
For the spring rolls
In a bowl, mix the pork and crab. Add the diced onions, kohlrabi and carrot, followed by the sugar, salt, fish sauce and egg. Stir until well combined.
Next, get the wrappers ready by preparing a small bowl of just-boiled water with 3 tbsp vinegar. Have the wrappers to hand and prepare one at a time on a board or plate.
Dip your hand into the water and stroke the water all over both sides of the rice wrapper, until it’s transparent and becoming loose and sticky.
On the side of the wrapper closest to you, put a generously heaped 1 tbsp of pork filling. Roll the closest edge over, tuck tightly and roll to the middle. Bring the sides in and roll until up until secure. Place on a clean dampened tea towel or greased tray so they aren’t touching, otherwise they may stick together.
Repeat until all the rolls are done. Then heat 1cm vegetable oil in a flat-bottomed pan – you’re shallow frying, not deep frying. Make sure the oil is nice and hot before putting your rolls in. Work in batches, so they don’t stick together and fry for 8 minutes, or until lightly browned and crisp. Keep finished rolls in a warm place until ready to serve.
For the dipping water
In a heatproof jug or bowl, dissolve the sugar in a touch of boiling water. Tip the carrot and garlic slivers in and add 3 tbsp vinegar. Add the chilli last, taste and adjust the sweet-sour ratio to your taste by adding more vinegar or sugar, as you like. Don’t be tempted to skip this sauce, it really makes the dish.
Serve the crispy spring rolls with the dipping sauce, salad and vermicelli noodles.
TIP: If you want to make a veggie version of the spring rolls, substitute the pork and crab for mushrooms or crumbled firm tofu.

Ester’s Georgian Walnut Chicken
“It was just from watching my mother deliver these incredible feasts on a daily basis that I gleaned my culinary know-how. This dish was one my mother would make often and it reminds me of the home I grew up in.”
Driving to Haifa from Tel Aviv on an empty stomach was good advice from Roni, granddaughter of Ester. She knew her grandmother, in true Georgian style, would put on a lavish feast. Ester lives in a block of apartments, her flat neighbouring her family’s own home. Just two front doors separate her from her son, daughter-in-law and grandchildren, so while we cooked, the entire family would pop in and out to grab various bits from the kitchen or just to get a glimpse of their granny in action.
We usually ask for one dish from each grandmother but Ester was one of the ladies that went overboard on her food prep. We whizzed around after her, trying to measure flour as she ‘felt’ the amount she’d need to make Khachapuri, a traditional Georgian cheese bread (so indulgent and delicious). We handled animal intestines as she expertly stuffed them with aromatically spiced meat for perhaps the biggest sausage we have ever had the pleasure of holding. We watched as she blitzed the most obscene amount of garlic into a paste for a chicken dish that is definitely best reserved for any night but date night.
Lunch was served next door, with the rest of the family, where we took up residence at an enormous banqueting style table, ten of us sharing from enormous platters placed across its length. A rowdy, playful and laughter-filled lunch that saw grandchildren tease grandma, laugh at her stories and at times, become unexpectedly quiet to catch an anecdote they hadn’t yet been privy to hearing.
Satcivi (chicken with walnut sauce and polenta)
Feeds 4-6
Takes 50 minutes
Ingredients
6 chicken thighs
2 tbsp rapeseed oil
600ml chicken or vegetable stock
300g quick polenta
For the walnut sauce
1 small white onion, diced
1 tsp rapeseed oil
400g walnuts
4 cloves garlic
1 tbsp curry powder
1 tsp chilli flakes
1 tsp salt
1 tsp white pepper
Method
Preheat oven to 220°C/200°C fan/gas 7. Place the chicken in a baking tray and drizzle with the oil and season, rubbing all over to coat.
Roast in the oven for 30 minutes, or until cooked through and golden on top. Remove and set aside.
Next pour the stock into a large saucepan and bring to the boil. Add the polenta in a thin stream, stirring continuously until it thickens, about 2-3 mins.
Take off the heat, cover with a lid and leave the polenta to swell and absorb more of the stock.
Now make the walnut sauce: fry the onion in a little oil for 7 minutes until softened and golden at the edges. Set aside.
Blitz the walnuts and garlic in a blender until they form a wet paste. Transfer to a bowl and stir in the curry powder, chilli, salt and pepper.
Wet your hand and squeeze and massage the walnuts for about 10 minutes. They’ll become smoother as you manipulate them. Some oil may begin to show - if it does, drain it off and save to drizzle over the final dish.
Add the walnut mix back into the blender with the onion and turn on. Slowly add water until it’s a liquidy consistency, a bit thicker than double cream – about 400ml, but you may need a bit more.
Put the sauce in a pan, bring to the boil and simmer for 5 minutes. Stir the chicken thighs into the sauce with all the chicken juices (really scrape the tray to get all the cooking juices in). Cook for 15 minutes and test the seasoning.
Serve with the polenta and a veg of your choice.
Tip: for added flavour, use 400ml chicken or vegetable stock instead of water when you add the walnuts back to the blender.

Edna's Romanian Pickled Peppers
“This is a dish I like to make because it’s simple, easy and instantly reminds me of my childhood growing up in Romania. It’s usually something we will eat as a starting dish or as an accompaniment to a main meal and it’s really very typically Romanian.”
In Tel Aviv we revelled in shakshuka, dunking thick Challah bread into runny eggs yolks and tomato stew rich with cumin, daily. We marvelled at its rich culinary scene. It’s a foodie paradise. It’s also a city of contradictions, in which we were made to feel so welcome by those who once were strangers to the place themselves. It’s a place laden with expectations and heavy with judgement. And so we went into Edna’s city apartment armed with questions about what it really feels like to be a ‘citizen’ of Israel. How do those who migrated here perceive their own relationships and claim on this rich city?
The door opened onto a cosy apartment, framed photographs of grandchildren lining the walls and an entire family, Edna, her husband, her granddaughter Shira and her son and daughter-in-law to welcome us in from the blustery day beyond this warm scene.
We were given a quick demo on how to make her super simple marinated peppers, to be served as a side or as part of a table full of meze sharing style plates. Most of our time with Edna was spent chatting about the city and her husband, who she’s still goo-goo eyed over so many years into their marriage. The whole experience felt so wholesome against a backdrop of extreme contention. It made us realise just how complex and contradictory humans really are.
Feeds 4 as part of a meze
Takes 35 minutes, plus 1 hour marinating time
Ingredients
½ tsp olive oil
2 large red peppers
apple cider vinegar
pinch sea salt
pinch granulated sugar
Method
Take a drop of oil in your hand and rub all over the two peppers. Place the two peppers directly onto the gas hob or under the grill on the highest setting and begin to blister the peppers.
Use tongs to turn the peppers once one side is charred. Keep cooking until the skin of the whole pepper is black, this could take up to 15-20 minutes.
When done, place the peppers in a glass bowl with a plate or clingfilm over the top for 5-10 minutes, this will loosen the skin.
When the time is up you should be able to rub all the black skin off with your hands – it’s okay if a few flecks are left. Cut around the stalk to remove the heart and seeds, then lay out on a board and sprinkle all over with a little salt and sugar.
Put in a wide bowl and just cover with apple cider vinegar and leave at room temperature for 1 hour.
When the time is up, pour away the vinegar (save for a dressing if you like) and serve the peppers as part of a meze feast with cheeses and salamis.
Many thanks to Frank London and Visit Tel Aviv for facilitating our trip out to cook with Edna and grandmother Ester.

Nella's Sicilian Arancini
“My grandchildren love my arancini. It’s not something you should eat alone - I’m going to ring Viola now and tell her to come over!'“
Nonna Nella was born and raised in Siracusa. She made us Arancini Siciliani, where thick, sweet ragu, stretchy provola cheese, peas and parmesan hibernate inside a mini mountain of golden bread-crumbed rice.
She appeared in a grey two-piece skirt suit to go to the butchers. Back in her yellow kitchen we prepared the rice and ragu for the following day, when she would speedily carve three immaculate arancini to every slightly contorted one of ours.
Traditional sicilian arancini is cone shaped, which signifies that it has meat inside. A round one is more likely to be simple tomato and cheese. Often you’ll find swordfish arancini (spada) around Siracusa.
Ingredients
(12 arancini)
400g cups risotto rice
2 eggs
Provola cheese (stringy cows cheese)
Parmesan cheese
200g minced beef
Passata - about 10 tablespoons
Peas (frozen)
Breadcrumbs
Flour
One white onion (half finely chopped for ragu and for risotto, the other to throw into the stock)
1 garlic clove
One peeled carrot, cut into three
One celery stalk, cut into three
Method
You need to start this recipe the day before or at least 4 hours before as the rice and ragu need to be fully cooled before arancini formation begins.
Bring about 800ml water on to boil with the carrot, celery stick and half a white onion. This will be your stock to add to the rice. To save yourself a pan, add the two eggs to the water and remove after 10 minutes. These hard boiled eggs will go inside the arancini when you make them.
In another pan, sweat the quarter chopped onion a little and then add the rice. Stir the rice so it’s coated in oil then slowly start adding the stock. After about 20 minutes of stirring and adding stock, test the rice - should be soft with a tiny crunch at the centre. Stir in 2 tablespoons of passata for colour and add salt to taste.
Pour the rice out onto a baking tray and spread out so it can cool quicker. Making holes in the rice helps with cooling speed.
Now make the ragu. Fry the other quarter diced onion with garlic. When it’s soft and starting to brown, add the meat. Then add about 8 tablespoons of tomato passata, a generous sprinkle of sugar and salt and leave to cook with a lid on for about an hour, stirring occasionally and adding more passata if it’s a little dry. When it’s reduced and the meat is soft and seasoning good - leave to cool.
The next day or when the rice and ragu have cooled, cook two handfuls of peas by dropping into boiling salted water. Peel and cut the hardboiled into little 1 cm cubes. Cut the provola into little half cm cubes.
Prepare a small plate with olive oil - you’ll keep dipping your hands in here before picking up more rice.
Then you should have in front of you: peas, rice, olive oil, eggs, grated parmesan, provola cubes and the ragu.
First take a generous grab of rice and flatten it out in the palm of your other hand so it comes up and around the edges a bit and covers the whole palm. This is the bottom cup of the arancini.
Add a heaped teaspoon of ragu, a piece of egg, two or three pieces of prevola, a teaspoon of peas and a sprinkle of parmesan. Add a blob of rice on top and shape it around the filling. If you see holes appear or filling exploding out, patch with a little more rice. As is traditional, keep turning and squeezing at the top to ensure the arancini is cone shaped. Every time you start a new one, dip your hands in the olive oil so they don’t pick up too much rice! Nella’s arancini were about 12cm tall.
When your arancini are shaped, get two low sided bowls - one for breadcrumbs and one for ‘glue’. Fill one bowl with water, a pinch of salt and about two teaspoons of flour. Mix with a fork to form a creamy thick paste. Pass each arancini through this ‘glue’, roll in breadcrumbs until coated and set aside to be fried.
When you are ready, heat a mix of olive oil and sunflower oil in a pan. When you drop a breadcrumb in and it sizzles, the oil is hot enough. Start the arancini on their bottoms, then slowly rotate in the oil until nicely browned all over. You can use a deep fat fryer if you have it.
Eat while hot with a cold beer for maximum pleasure.

Dora's Sicilian Vegetable Salad (Caponata)
“Sicilian food is simple but you must treat every ingredient as an individual before you bring or layer them together”.
Dora is the head chef at Rocca Delle Tre Contrade, an elegant villa encircled by lemon groves, standing on a hill between the Ionian Sea and Mount Etna, where Iska spent a summer cooking with her. Dora is well under five feet tall, her perfectly fluffed hair adding an inch or two. She wears little heeled sandals while cooking and commands her kitchen with a booming, husky voice.
She serves four immaculate courses every evening for 24 adoring guests, twisting spaghetti alla vongole in a ladle and onto plates, lifting the weight of a whole suckling pig from the oven and carving like a master butcher. She measures everything by hand, seasons with abandon and tastes constantly until she is happy. She frequents the fish market in Giarre at 7 a.m., where they fear her, for she can be satisfied with only the freshest, finest fish.
Her dishes are intrinsically Sicilian with modern flourishes. This caponata – sweet and sour in equal measure, sticky with a varnish of olive oil – is served once a week as an aperitivo and devoured by the guests. It’s best served warm but is also delicious cold from the fridge the next day, when the flavours have deepened. Dora uses a deep-fat fryer to brown all the peppers and aubergines before they’re added. You can simply brown in olive oil.
Nona Dora’s Sicilian Caponata
(Feeds 6–8)
Ingredients
2 celery stalks, cut into ½cm crescents
3 aubergines, peeled and cut into 2cm cubes
3 red peppers, deseeded and cut into 2cm cubes
olive oil, for frying
½ onion, roughly diced
1 tbsp capers
100g pitted green olives, roughly chopped
3 basil stalks with the leaves on, plus more to serve
1½ tbsp sugar
3 tbsp red wine vinegar
1 tsp salt
toasted pine nuts, to serve
Method
Put a pan of water on to boil and blanch the celery for 3–4 minutes to soften. Drain and set aside.
If you have a deep fryer, set it up for the aubergines and peppers. Deep fry in batches until browned and sticky-looking, then set aside. Alternatively, cook them in batches of olive oil.
In a sauté pan fry the onion until starting to brown. Add the capers, olives and blanched celery, and fry in the oil some more.
Add the fried aubergine and peppers and the basil to the pan. Stir in the sugar, red wine vinegar and salt. Continue to cook for about 10 minutes then turn off the heat, put the lid on and leave for a few minutes to allow the flavours to meld in the residual heat.
Serve warm on toasted bread with pine nuts and torn basil on top.

Nicoletta's Sicilian Watermelon Jelly
“My own step-grandchildren love my Gelo di Mellone, which is a Sicilian dessert. I’m Venetian but since I’ve been living here in Sicily for so many years, I learned to cook the traditional Sicilian dishes.”
As we learned to prepare Nicoletta’s favourite Sicilian dessert, she was also intermittently checking on her husband setting the table (“he always does this - he didn’t wait for the dishwasher to finish before taking out the cutlery”), making dinner for the evening and texting the boiler man to come and fix a problem with the heating.
It would have been the ultimate scene of everyday domesticity, were it not played out for us in a 16th century Sicilian palace by the Italian duchess of Palma. “Unfortunately, modern duchesses don’t have time to polish their nails,” she shrugged while shoving a tray of rosemary-seasoned potatoes in the oven, brewing us a tea and ordering her husband – Duke Gioacchino Lanza Tomasi, adopted son of Italy’s most celebrated author, Giuseppe Tomasi di Lampedusa – to “just please wait for the dishwasher to finish its cycle.”
This cooking duchess invited us into her palace for a special culinary masterclass spiced with Sicilian history, calling each of us ‘piccolina’ and driving home just how important it is to cook when you’re a ‘mamma’. Her spirit is every bit that of a true matriarch and her fierce energy is enough to dispel any image of a puffed-up aristocrat lethargically lounging on a chaise longue.
Feeds 6
Takes 20 minutes, plus steeping and cooling time
Ingredients
1 watermelon (2½-3kg), flesh deseeded roughly chopped
1 handful of jasmine flowers, plus some for decoration (optional)
75g cornflour
150-200g of sugar, depending on the sweetness of the watermelon
100g dark chocolate chips, or shards of finely chopped dark chocolate
Method
Push your chopped watermelon flesh through a fine-mesh sieve or whizz in a blender until smooth and measure out 1L of juice. If you have extra save, chill and serve with mint for a refreshing drink.
Put the juice in a large bowl with the jasmine flowers and let steep for a few hours, then remove and discard the flowers.
Pour the juice into a saucepan, add the sugar to taste and whisk in the cornflour. Cook over a low heat, stirring constantly until it comes to a boil and thickens. Time 1 minute and remove from the heat.
Pour into a large glass bowl or individual ramekins (or champagne saucers for glamorous presentation!) and let cool. Refrigerate until set and cold.
Before serving, garnish with chocolate chips (so as to imitate the watermelon seeds) and jasmine flowers.
You too can meet Nicoletta, cook in her palazzo kitchen and stay in her beautiful 18th Century home in Palermo - she’s the most wonderful host.

Juana Maria’s Cuban Plantain Soup
“I began to make this soup around forty years ago and have been making it ever since. I don’t like noodles with soup or pasta in a broth so I decided to start adding plantain to make my broth more substantial.“
Cubans have long been suffering from desperate food shortages, with people forced to wait for up to five hours a day to collect their rations of meat, poultry, eggs, rice, beans and other staples. The USA’s blockade has catalysed the nation’s most recent crisis, in which we met Juana-Maria, who struggles daily to get by. Cuba’s communist government regularly runs out of money to pay for food, two-thirds of which is imported. Hence the inflated costs at which we had to purchase the few ingredients that make up this warming - but humble - plantain soup.
Juana Maria lives in a teeny flat on the outskirts of Havana. We took a 40 minute taxi - an ancient 1950s Chevrolet - through streets pocked with pot-holes, past rainbow coloured shanty houses and effervescent locals blasting Salsa from their boomboxes in the street to get to her.
After whipping this up in her kitchen, which could barely squeeze two of us in, we sat down in the living room, crammed with bric-a-brac and religious icons, and tucked into our soup. Somehow, Juana Maria had managed to turn just three ingredients – a plantain, chicken stock and an onion (she adds gouda when she can find it) – into a delicious, hearty meal. We were even more surprised to hear the role her husband had, had in La Revolucion and sat like children at story time, handling her ratio book and listening to her recount the first days of Che Guevara and Fidel Castro’s Revolution in La Habana.
Juana Maria uses a variation of the following ingredients, depending on what she can get her hands on in Havana. If she’s without garlic, she will use more onion, or vice versa. The core ingredients are onion, plantain and chicken broth. The fried plantain can be substituted with baked plantain chips for a healthier, speedier alternative.
Feeds 6
Takes 50 minutes
Ingredients
1 chicken carcass (fresh from the butcher or left over from a roast)
1.5l water
1 onion, peeled and quartered
3 garlic cloves, peeled and bashed
3 unripe green plantains, peeled and sliced into 2–3mm rounds
600ml vegetable oil, for deep frying (or follow the option to bake)
200g Gouda, grated
handful fresh coriander, chopped
Method
In a large pot, put the chicken carcass, water, onion and garlic. Bring to the boil and then simmer on a low heat for about 40 minutes.
While your broth is simmering, tend to your plantains. You want to make sure your plantains are nice and green; this means they won’t be too sweet and will be super-starchy inside – perfect for thickening the soup. Your slices should be thin (don’t be tempted to slice fatter than 3mm), as the aim is to deep-fry or bake them so they are really crispy, then blend them into a powder.
To deep- fry: heat the oil in a pan suitable for deep-frying and then fry the plantain rounds in batches, ensuring your oil is sizzling hot before the plantain goes in. Take care not to overcrowd the pan or let the pieces touch each other. After about 6 minutes, or when the plantain is deep golden brown all over, remove with a slotted spoon and place on a kitchen towel to soak up the excess oil. Repeat until all the plantain is done. Allow the slices to cool – they should be nice and crisp.
To bake: preheat oven to 200°C/180°C fan/gas 6, and lay the rounds out on a couple of lined baking trays. Pop them in the oven for around 15–20 minutes or until they’ve lifted from the sheet at the edges and turned pale with touches of light brown. Remove from the oven and allow to crisp up as they cool.
Reserve a few for decoration and then crush the plantain slices to a powder using a spice grinder or blender, or if you’re feeling strong like Juana Maria, in a pestle and mortar. You may have to do it in a couple of batches. Pulse and scrape down the sides until it reaches a sandy texture.
Once your broth is ready, discard the onion, garlic , pepper and chicken. Add your crushed plantain to the broth and stir until the soup thickens. Season to taste, and if you like your soup a bit thinner, add a little more water.
As a final touch, you can add grated Gouda cheese and top with a sprinkling of fresh coriander and the crispy plantain you set aside earlier.