
GRAND DISHES SPENDS A DAY WITH EACH GRANDMOTHER, CAPTURING RECIPES THAT HAVE BEEN PERFECTED OVER A LIFETIME.

Dagmar's Croatian Fish Stew (Gregada)
“If you’re cooking this, ensure that your clams, your fish – everything is sourced on the day. There are not a lot of complex spices or herbs, the fresh fish and the shell of the prawns and the clams gives it a lovely taste of the sea”.
Dagmar sent a boat for us. We raced across the bay to Palmizana island with ear-to-ear grins. A battered, chugging Land Rover took us up the hill, deeper and deeper into a botanical playground. It dropped us at the top of the path down to the Meneghello home - bright red and royal blue, covered with bold art, rosemary bushes, olive and orange trees between mad, giant cacti. Dagmar’s family bought the island in 1906 and slowly created a paradise, importing the cacti from Mexico.
Dagmar cooked her gregada stew on an open flame. Two tanned males got a menacing fire going in a matter of seconds upon her command. It also works fine on high heat on the hob. Any white fish will work, it’s just very important that it’s super fresh. Dagmar used red scorpionfish (traditionally associated with Bouillabaisse), grouper fish, big shrimp and clams.
Eight women ate at a red and blue table overlooking the sea, including two of Dagmar’s best friends - a cool, red-headed artist and beautiful befreckled jewellery designer who exalted the power of female friendships and believed that ‘women are simply on another dimension’.
Feeds 4-6
Takes 35 minutes
Ingredients
12 tbsp olive oil approx, plus more for serving
3 medium potatoes, sliced into 0.5cm rounds
2 small/medium onions, sliced into thin rings
2 garlic cloves, sliced into thin slivers
½ bunch fresh parsley, leaves chopped
500–600g mixed white fish and seafood of your choice (Dagmar used red scorpionfish, sea bream fillet, king prawns and clams)
300ml dry white wine
Method
Cut any larger fillets of fish into chunks and set aside.
In a flat-bottomed, low-sided pan drizzle in some olive oil. Layer the potatoes on the bottom of the pan, then drizzle with a little more olive oil and a sprinkle of salt.
Layer the onion rings on top of the potatoes, then drizzle with olive oil and sprinkle with salt again.
Scatter the garlic over, followed by a small handful of parsley. Next add the fish and another handful of parsley.
Pour over another generous drizzle of olive oil and the white wine. Top up with boiling water so that the fish is still visible above – you can make it more soupy by adding more liquid if you like, but Dagmar likes just a small amount of broth.
Cook uncovered on a very high heat for 20 minutes, or until the potatoes are soft. Don’t be tempted to stir it in case you break up the potatoes and fish. Instead, just give it a shake from time to time to ensure the potatoes aren’t sticking to the bottom of the pan.
After 20 minutes the sauce should have reduced. Check the sauce for seasoning and add salt if it needs it.
Serve in individual bowls, topped with the remaining parsley, a grind of black pepper and a drizzle of olive oil.


Flora's Croatian Gnocchi
“Traditionally the meat is served with NJOKI - potato dumplings - generously sprinkled with hard cheese. This is a basic recipe with a little lemon zest and nutmeg in the mix”.
On day two with Flora in Croatia we embarked on a mammoth gnocchi-making session (in Croatian NJOKI). Traditionally these dumplings are the accompaniment to pašticada, a typical Dalmatian beef stew made with Croatian desert wine, prunes for sweetness and cloves and nutmeg for spice. Flora’s gnocchi are particularly elegant, their detailing created with a quick roll across the back of a cheese grater. Their textured nature ensures they pick up all the gravy. Flora advocated lots of parmesan to finish. We made a vegetarian version with crispy fried sage leaves from the garden and extra butter (and more parmesan).
Feeds 6–8
Takes 2 hours
Ingredients:
1kg floury potatoes, evenly sized (Désirée potatoes work well)
250g plain flour
3 generous tbsp semolina
1 large egg, beaten
70g butter
zest of 1 lemon, grated (to taste)
250g plain flour
3 generous tbsp semolina
1 large egg, beaten
pinch grated nutmeg
Method
Wash the potatoes and boil them whole, with the skin on, in a large pan of boiling salted water for about 20 minutes, depending on size, until they are just soft. There should still be a little resistance when you push a sharp knife into the middle. The main thing with gnocchi is that you don’t want your potatoes to absorb too much water.
Drain them, peel while still hot (hold them in a tea towel to peel to protect your hands).
Push the flesh through a fine-mesh sieve with a spoon (or put through a potato ricer as Flora does!) into a large mixing bowl, ensuring they are lump- free. It's important to make the dough while the potatoes are still hot, or you risk making your gnocchi chewy, so work quickly.
Make a well in the middle of the mashed potato and add the butter, lemon zest, nutmeg and some salt to taste.
Sift the flour and fold it in gradually, with the semolina and beaten egg. Knead well, adding more flour, if needed, to make a light dough that does not stick to your fingers.
Taking a large handful of the dough at a time, shape and roll each one with your hands on a floured surface to form a thin sausage.
Cut each sausage into 4cm pieces and use your palm to roll them into balls. You can leave them as they are, or to make the surface textured, roll each ball lightly across the back of a flat grater – done skilfully this produces an interesting patter of lines and surface rippling, which helps them to pick up the sauces they’re served with. Repeat until you’ve used up all the dough.
Bring a large pot of salted water to the boil. Drop the gnocchi into the water in batches. When they’re done they’ll rise to the top of the water and can be lifted out with a slotted spoon. Serve with the sauce of your dreams and freshly grated parmesan.

Flora's Croatian Octopus Salad
“I learned to make this dish almost fifty years ago. It was my uncle’s recipe. He was a sailor and had only a few dishes that he could cook really well.”
Flora met us off the ferry at Hvar in a generously -rimmed striped straw hat and modish circular sunglasses. We walked around the bay to the home she inhabits half the year, next door to the infamous Hula Hula bar. We sashayed past with pride, in the knowledge that we were defying tourist traps and getting the fully local experience.
Next day was octopus salad day. Our octopus came from a local chef called Car whom Flora has known since childhood. Because she was cooking for Grand Dishes he allowed her to buy one of his prized octopuses. Generally they’re very hard to come by at this time of the season (September).
Frozen octopus cooks much quicker than fresh and it doesn’t lose any flavour. Even if it’s fresh, it’s better to freeze it. The ice breaks the muscles down, which makes it much more tender. Usually the fishermen would also have bashed it about to break the tissue in the tentacles when it emerged from the ocean. We took ours down to the sea to finish the defrosting in salty water. Throughout the day Flora referred to it as ‘octopussy’, which naturally we all adopted.
Ingredients
For the octopus
1 large or 2 small frozen Mediterranean octopus, gutted
1 small red onion, peeled only
3 bay leaves
2 sprigs fresh of thyme
1 tsp dried oregano
1 handful of fresh parsley
2 tsp black peppercorns
2 wine corks (optional, added to the cooking water to encourage tenderisation, according to Flora)
For the salad
2 medium potatoes, peeled and halved
1 small red onion, finely chopped
2 plum tomatoes or 6–8 cherry tomatoes, chopped
1 small handful fresh parsley leaves, finely chopped (also good with dill)
4 tbsp capers and their juice
3 garlic cloves, finely chopped
8 black olives, sliced
8 kalamata olives, sliced
olive oil
balsamic or red wine vinegar
Method
Cooking octopus is simple, but if you aren’t careful the texture can end up a little rubbery, so make sure to freeze yours first and follow Flora’s instructions closely. Start by thawing the ‘octopussy’ in the fridge – Flora finished thawing hers in the sea.
Rinse off any grains of sand that might be left on the tentacles. Place the octopus in a large saucepan, add the whole peeled onion, all the herbs, peppercorns and the wine corks, if using. Cover with boiling water straight from the kettle and quickly bring to the boil again in the pan. As soon as it comes to the boil, immediately reduce the heat and let it gently simmer for about 40–-50 minutes, until tender.
While it cooks, start making the salad. Pop the potatoes in the octopus water to boil for 10–15 minutes, until tender. Prepare the vegetables and lay them out separately on your chopping board, ready to layer onto a serving dish when the time comes. When the potatoes are cooled, chop them into small cubes, put them in a small bowl and dress with olive oil.
When the time is almost up, start testing the octopus for tenderness by pushing a fork through the thickest part of the flesh, if it slides in easily, it’s done. It should be wonderfully pink: take it out of the water, admire it and leave to cool just a little.
It’s good to dress the salad while the octopus it’s still warm, so slice the octopus into 4mm coins and drizzle with olive oil, vinegar (Flora uses balsamic) sea salt and pepper, to taste.
Now start layering all the veg (the potato cubes, red onion, tomatoes, parsley, capers, garlic and olives) with the octopus, adding extra drizzles of olive oil and vinegar as you go.
And on the side – bread! Flora had a forgotten loaf that was a bit on the dry side, which she revived by sprinkling it with a little water and then ‘bunged’ in the oven to regain its past glory.


Gloria's Colombian Chicken soup (Ajiaco)
“I was a teenager when I first made this dish. I went to Bogota in search of a different life and I went on my own.”
It began with a mammoth drive – straight through the middle of the Brecon Beacons – to get to Gloria’s farmhouse in Presteigne, on the border of England and Wales. A flat chunk of mist was sitting on the trees at the top of the valley; it had rained non-stop for the last 24 hours. This made the cosy insides of Gloria’s barn conversion even more comforting.The house had touches of Colombia everywhere. Gloria’s dish was a true extension of her – warm and bright with hidden depths and rich context.
Ajiaco is a Colombian staple. In Colombia they have a much greater array of potatoes with different flavour profiles. The recipe must combine potatoes that dissolve with potatoes that maintain shape, adding flavour and colour.
In this recipe Gloria uses four kinds to mimic the variations found in traditional ajiaco. Ideally she would add a fifth variety – papa criolla – which have a deep yellow colour (and can be bought frozen in Colombian shops). The same goes for the traditional guascas (a native herb), which she managed to locate at the Colombian shop in Seven Sisters. She also tricks the eye and palette by adding fresh watercress for the illusion of fresh guascas. We finished with an elegant fruit- salad dessert of papaya, pineapple, orange, banana and grated coconut.
Feeds 6
Takes 2 hours 20 minutes, or 1 hour 55 minutes with a pressure cooker
Ingredients
1 celery stick, cut into large chunks
4 garlic cloves, 2 kept whole and 2 chopped
1 red onion, half cut into large chunks and half diced
1 white onion, half cut into large chunks and half diced
1 large carrot, cut into large chunks
1 red pepper, cut into large chunks
bunch spring onions, green tops only
4 corncobs (1 for the stock, 3 cut in half for each bowl of ajiaco)
bunch fresh coriander, stalks only
1 whole chicken, or 6 chicken thighs
1 tbsp olive oil
1 baking potato, peeled and thinly sliced so it dissolves easily
800g mixed small waxy potatoes, skin on and chopped into 1cm chunks (Gloria suggests Anya, Charlotte and red potatoes)
handful dried guascas (optional, for authenticity)
2 handfuls watercress, torn
For the spicy aji sauce
bunch spring onions, white parts only, finely chopped
1 bunch fresh coriander, leaves only, finely chopped
2 red chillies, finely chopped
1 large tomato, skin removed and chopped
juice of ½ lime
2 tbsp white wine or cider vinegar
For the garnish
6 tsp capers
6 tbsp sour cream
3 avocados, finely sliced
Method
Start by making the stock for the base of the soup: put the chopped celery, garlic, red and white onion chunks, carrots, red pepper and green ends of the spring onions into a pressure cooker or saucepan large enough to hold the veg and your chicken. Add one corncob (for extra corn flavour, says Gloria), the coriander stalks and chicken. Pour in enough water to cover, then season and feel free to chuck in any other rogue vegetables you need to use up to add more flavour.
Bring to a boil, then, if using a saucepan, put on the lid, reduce the heat and simmer for about 45 minutes until chicken is cooked through. If using a pressure cooker, put the lid on and cook for 20 minutes.
While the chicken is cooking you can prepare the ají sauce by combining all the ingredients listed in a bowl and top up with cold water to just cover.
When the chicken is done, turn off the heat and carefully remove it from the saucepan into a large bowl. When cool enough, shred the meat and set aside. Add the bones back into the broth and cook for a further hour.
Meanwhile heat the oil, fry both diced onions for 10 minutes, until soft and golden. Put the shredded chicken and the fried onion in a sealable container with a ladle of stock to keep them moist and put it in the fridge to marinate.
After 1 hour, remove the chicken bones and vegetables from the broth; they’re no longer needed. Add the baking potato and cook for about 15 minutes until the potato starts to dissolve. Then add the rest of the potatoes, remaining corncobs and guascas (if using), and cook for a further 20 minutes. Taste for seasoning.
Take the shredded chicken from the fridge, add salt to taste and add to the pan to heat through.
Just before serving, stir in the ripped-up watercress and ladle into bowls, making sure each person gets a piece of sweetcorn. Put ají (for heat and acid), capers, sour cream and avocado on the table for everyone to add themselves as toppings.

Kit's Chinese Pork Belly
“I like keeping my heritage alive here in the UK and eating the food I had when I was a little girl, it takes me back to Hong Kong.”
This recipe comes from Kit’s childhood in Hakka.
The sour pickled cabbage and red bean curd (or fermented red tofu) are easy to find in Chinese supermarkets. The soybean is fermented in rice wine and fermented red rice and brings a rich creamy texture to the final dish!
Kit uses a particularly snazzy wok she brought back from China - but she promises that any wok will do!
Ingredients
350g packet sour pickled mustard cabbage
500g belly pork slices
thumb of Ginger
salt and pepper
light soy sauce
1 tbsp cornflour
1 clove garlic
tin of red bean curd (397g tin) – use one cube
handful of spring onion shoots (the green ends better to use!) or chives
Method
Roughly slice the pickled cabbage and soak in fresh water for half an hour to get rid of some of the salt
Chop the pork into 3cm wide slices
Place the pork in a bowl with ½ tsp salt, 1 tsp sugar, 1 tsp soy sauce (for colour) and 1 heaped tbsp corn flour with 2 tbsp water. Mix well to cover the pork, cover and put into the fridge for an hour
Peel and dice the garlic clove
Peel and slice the ginger into thin slivers
Drain the water from the cabbage
Add 1 tbsp olive oil to the wok with ½ tsp of salt and ½ tsp sugar and stir fry the cabbage for 2-3 minutes. Remove from the pan and set aside.
Add a splash more oil, fry the garlic and ginger pieces for a second then add the pork.
Stir fry until browned and add the block of bean curd, plus a splash of bean curd juice from the tin.
Add enough water to just cover the pork, bring it to the boil, turn the temperature down and put a lid on and cook for half hour.
Add the pickled cabbage and cook for 10 more minutes.
Stir in lots of chopped spring onion and you’re ready to serve.
We ate the pork with (perfectly) steamed rice, chicken and mushrooms, Chinese cabbage, and a chive omelette for our vegetarian representative.

Ciccina’s Sicilian Pasta Bake (Taiano)
'“It’s one of my favourite dishes and I love it because I make it with all my heart because it’s for special occasions.”
In the south of Sicily in the countryside of Licata, we spent a day learning to roll fresh pasta with Nonna Ciccina in her outdoor garden. Cooking up a taiano is a real process, usually reserved for feasting days like New Year’s or Ferragosto (the very special saint’s day of 15th August).
First Ciccina prepared the pasta dough, returning to knead and roll hundreds of intricate individual pieces of strozzapretti (you can of course, just use a good-quality shop-/deli-bought pasta), before moving on to the many individual components that make up the layers of a traditional Sicilian, pasta al forno (oven- baked pasta).
After five hours of preparation, countless stages and continual poking of the traditional wood- fired oven from an impatient Ciccina, the taiano was ready. What we were not counting on was the entire tray being dropped on the floor by her son-in-law before it even reached the table. We saw the funny side, but tensions in the family were at an all-time high. She was not a happy Nonna.
Thankfully, our photographer, Ella, is vegetarian and we’d made a spare veggie tray for her, so no harm done.
Feeds 4–6
Takes 1 hour 40 minutes
Ingredients
5 tbsp olive oil
1 small onion, finely diced
1 small carrot, finely diced
100g peas, fresh or frozen (optional)
700g passata
1 bunch fresh basil, leaves picked
500g cauliflower, cut into small florets and boiled with a pinch of salt until soft, and chopped up
3 eggs, 2 hard boiled and 1 whisked to pour over before cooking
400g strozzapreti pasta (or another good- quality dried pasta)
125g ricotta
3 eggs: 2 hard-boiled and 1 whisked to pour over before cooking
50g parmesan
Method
For the sugo (tomato sauce): heat a glug of olive oil in a large lidded pan and fry half the chopped onion and half the carrot until soft and golden. Stir in the peas and a couple of pinches of salt for 1 minute.
Add the passata, then fill the empty container/s with water and add this to the pan as well. Add a good grind of salt and black pepper, and a pinch of sugar to reduce the acidity of the tomatoes if it needs it.
Add the basil leaves, leaving a few to garnish, if you like. Bring to the boil then turn down to a simmer with the lid on. Allow to simmer for 1an hour while you prepare the other layers of the dish.
For the cauliflower: heat a glug of olive oil in another pan and fry the other half of the onion and carrot until soft. Add your pre-boiled cauliflower florets, drizzle in more olive oil and cook on a low heat for 3–4 minutes until it has soaked up the oil. Take off the heat, season and set aside.
For the pasta: Boil water for your pasta and add salt (Ciccina says don’t add oil!). Wait until it’s bubbling away before you add the pasta and cook 2 minutes less than the time indicated on the packet to ensure it’s al dente. Drain the pasta, keeping a ladleful of cooking water to help your pasta bind with the sugo better.
Preheat oven to 200°C/180 fan°C fan/gas 6.
Now for the layering: drizzle a 20 x 30cm tray with olive oil followed by a layer of pasta and a ladle of sugo to cover, then crumbled fresh ricotta, crumbled cauliflower florets and sliced boiled egg.
Then repeat, until your tray is full. Finish with a hefty grating of parmesan, black pepper, a drizzle of olive oil and the whisked egg poured over your tray of ingredients before it goes in the oven for 30 minutes.
When it’s caramelised on top, remove from the oven carefully and serve with more parmesan, the reserved basil leaves (if using) and a good Italian vino.


Fina's Sicilian Sardine Spaghetti
“The tip of the kitchen in Sicily is cook with feeling - the best cooks can feel how much they need. I respect the precise measurements only when I am making dessert.”
We’ve come to a fair few of these grandmothers through friends of friends. Fina came through our good pal, Stefano. Over the course of a few weeks and months, we’d managed to contact Fina’s niece, (texting her in our broken Italian), who then went back and forth between Fina and her own daughter, to pin down a recipe and date and time upon which we could visit her.
Eventually we set out to road- trip through Sicily across two weeks in September, three grannies in our diary. So excited were we for our granny hat-trick, that the night before meeting Fina, upon landing in Palermo, we set out for aperitivos. One negroni led to another and while one of us didn’t make it home until 5 a.m., the other didn’t make it back to the hotel at all.
Still, we are dedicated to our granny mission. We showed up to Nonna Fina’s with time to spare, albeit a little bleary-eyed. She cared for us as our grandmothers would have, with a plateful of comfort food and a wry, knowing smile that said, ‘I’ve been there. I know you better than you know yourselves.’
This rich, sweet-savoury pasta dish was exactly what we needed and by our second helping, we’d all but forgotten our throbbing temples. The formaggio povero (poor man’s parmesan) – essentially fried breadcrumbs – added texture and depth of flavour and was an essential finishing touch to soak up the alcohol.
Feeds 4
Takes 40 minutes
Ingredients
175g fennel, finely sliced
1 shallot, finely diced
3 tbsp extra virgin olive oil
4 tinned anchovies
60g raisins
60g pine nuts
350g sardines, de-headed and chopped up
2 tbsp tomato purée
100ml white wine
Pinch caster of sugar (optional)
400g bucatini pasta
squeeze of lemon (optional)
For the povero cheese (crispy breadcrumbs)
125g breadcrumbs
glug of olive oil
Method
Gently boil your fennel until soft (about 5 minutes) then leave in the water to soak until it’s needed.
Fry the shallot in the oil on a medium–low heat until translucent and starting to turn golden.
Add the anchovies to fry with the shallot – these will almost dissolve as they cook and add a salty kick.
Once the anchovies have broken down, add the raisins and pine nuts, swiftly followed by the fresh sardines, tomato purée and white wine.
Drain the cooked fennel over a jug, reserving the water. Add the fennel to the pan.
Add a pinch of sugar (if using), a hefty grind of salt and black pepper. Stir your sauce to combine and use the fennel water to just cover the ingredients and bring to a simmer.
Turn to a low heat and cover. Once the oil has risen to the surface and the layer of foam has cleared, that’s when your sauce is ready – this should take about 10–15 minutes. It should be a loose and saucy consistency.
When this happens, put your salted water on for your the pasta. Fina uses bucatini pasta – the hole running through the middle is perfect for catching the sauce, but feel free to use whichever you prefer.
While the pasta cooks, begin to toast the breadcrumbs in a non-stick frying pan. Add a good glug of olive oil and disperse across the breadcrumbs by stirring. Keep stirring for about 2 mins minutes, or until they turn golden. Season as you like.
When the pasta is al dente, drain and toss with the sauce and serve with a squeeze of lemon and the breadcrumbs scattered over the top.

Mercedes' Spanish Chilled Almond Soup
“My grandmother had a lovely garden. But when the war came my mother, who was very practical, took away all her beautiful roses and flowers and instead planted tomatoes, green beans, cabbages, carrots.”
An unassuming lift in a 1970s apartment block opened on to a kaleidoscopic pattern-on-pattern-on-pattern apartment, where a petite woman of great character was poised to make ajo blanco with us. White garlic, white bread and white almonds against a house of red, pink, green and purple. A dainty, creamy, chilled soup produced by a grandmother who danced about her kitchen with extreme agility, spilling things and laughing endlessly. It was a splendid, sensory onslaught from the moment we arrived.
At one point we asked what the tray on the wall was used for. It had a plate, cutlery and cups painted into its surface in childlike strokes. ‘Breakfast in bed – every day!’ she told us. When we asked what that involved, she decided she’d perform it for us. Within 10 minutes she was sitting up under the covers in her pink- and- white nightie, spooning homemade marmalade onto toast.
We ate the soup from a giant porcelain soup tureen with a carnation strapped to the handle. This soup can be eaten immediately, but is better chilled for a couple of hours for the flavours to fuse. We took the time to fuse too, with a glass of red and a sliver of prosciutto. Then all eight women gathered around her Vogue-Living-worthy dining table to dine on ajo blanco and pimientos del pico rellenos de bacalao, a dish from her childhood in northern Spain.
Feeds 4
Takes 20 minutes, plus 2 hours chilling
Ingredients
125g white bread, crusts removed (it’s good to use up stale bread)
75g blanched almonds
1 large garlic clove, finely chopped
100g melon, cubed (galia or honeydew work well)
1 tbsp red wine vinegar
100ml good olive oil
1 egg
1 tsp salt
1 tbsp water
handful fresh parsley, finely chopped
Method
Soak the bread in water for 10 minutes.
Squeeze out the bread a little and add to a blender with the almonds, garlic, melon, vinegar, oil, egg, salt and water.
Blend for 4 minutes, until smooth and the consistency of single cream. Add more water, if needed.
Transfer into a bowl and put it into the fridge for at least 2 hours before serving into bowls with an extra drizzle of olive oil on top and a sprinkle of fresh parsley.

Mercedes' Spanish Salt Cod stuffed Peppers
“My family comes from the north of Spain, which is where this recipe comes from. In my hometown of San Sebastian, the ladies of the house were supposed to cook very well, otherwise they were completely disgraced”.
An unassuming lift in a 1970s apartment block opened on to a kaleidoscopic pattern-on-pattern-on-pattern apartment, where a petite woman of great character awaited us. Together we made ajo blanco soup and pimientos del pico rellenos de bacalao, a dish from her childhood in northern Spain. She danced about her kitchen with extreme agility, spilling things and laughing endlessly. It was a splendid, sensory onslaught from the moment we arrived.
Halfway through pepper preparations we stopped for a photo. The peppers were all beautifully laid out, stuffed and awaiting the deep frying procedure. Mercedes lifted the large plate of peppers over high over her head into a sort of bodybuilding pose. Unfortunately she leant forwards and half of the peppers slid to the floor, lubricated with by their own oils.
It was not an issue. She scooped them back up, giggled and sent them back to the kitchen for frying. She served her peppers on a large dish emblazoned with her own name. How brilliant.
Feeds 4
Takes 1½ hours, plus 24 hours soaking
Ingredients
300g salt cod, flaked by hand into small pieces
3 tbsp olive oil
3 onions, finely diced (½ for the sauce)
2 garlic cloves, finely chopped (½ for the sauce)
1 tbsp flour, plus extra for dusting
150ml milk
14 roasted red peppers from a jar (2 for the sauce)
light olive oil for frying
1 egg, beaten
1 red pepper, finely chopped
juice from the jar of peppers
50ml cream
350ml fish stock
handful fresh parsley, finely chopped
Method
To prepare for this dish you need to desalt the cod 24 hours in advance. Do this by soaking the flaked salt cod in a large bowl of cold water, changing the water every 6 hours, if possible.
Heat 2 tbsp of the olive oil in a sauté pan and cook the onion for 5 minutes, then add the garlic and cook until everything is transparent, not golden – about 5 minutes more.
While the onions cook, drain the desalted cod (saving the water) and lay out on a clean tea towel to soak up any extra moisture. It’s important that it’s totally dry.
Set half the cooked onions and garlic aside in a bowl for the sauce. Spoon the cod into the onions, adding the remaining olive oil. Stir in ½ tbsp flour and a generous glug of the milk. Cook for 5 minutes as it thickens, then add the another ½ tbsp of flour and the rest of the milk. Cook for a further 5 minutes until the taste of flour has gone completely and it’s a loose, slightly sticky béchamel consistency. Add a touch more milk if you think it’s getting too thick.
Lay 12 of the peppers out on a tray or platter ready to stuff. Spoon about 1 tbsp of the cod mixture into each pepper and secure the top by threading a toothpick through.
Heat a deep frying pan with light olive oil about 2cm high and prepare two wide bowls, one with flour in and one with beaten egg. Light olive oil is better, as extra virgin will smoke quicker due to its low burning point.
When the oil is frying hot (bubbles gather quickly round your wooden spoon when you dip the end in), begin to dip and coat each pepper first in flour and then in egg and drop into the hot oil.
Fry on each side until golden and remove with a slotted spoon onto a kitchen towel to remove excess oil. Keep warm while you make the sauce.
Put the saved bowl of cooked onion and garlic into a large saucepan on a medium heat, Add the 2 jarred peppers you saved, the chopped red pepper and a little juice from the pepper jar. Cook for 10 minutes until the peppers are soft and the mixture smells sweet.
Turn off the heat and use a hand blender to whizz the sauce together with the cream and fish stock.
Add the stuffed peppers to a pan with the sauce and cook on a low heat for 30 minutes before sprinkling with a handful of parsley and serving simply with a green side salad.

Ania's Polish Steamed Buns with Blueberries
“I’d go with my grandfather, father and siblings to pick berries in the forest. We’d fill two huge pails with wild blueberries, seal them in glass jars and then boil the jars in hot water to make a jam for blueberry pierogis.”
Ania is the grandmother of our friend Carla. Babcia Ania made us pampuchy, a Polish steamed dumpling similar to bao buns. They can be eaten sweet or savoury. It’s the dish her grandchildren always ask for when they go to visit her.
She usually lives in an apartment in Suwałki, but the family decided that our cooking adventure should happen at her daughter’s home just outside Poznań, due to size. The house was surrounded by forests and was a half-hour drive from the lake where we all went for a late-afternoon swim.
On pampuchy day Babcia had 14 mouths to feed. This meant we ate in two ‘loads’ at the table while Babcia established a very successful production line steaming a round of buns while others rose. We ate them first with a rich pork and onion stew called gulasz, using the fluffy buns to soak up the gravy. Then we ate them with the blueberry sauce – made with blueberries we’d watched her barter for with serious gusto at the market in Poznań that morning.
Makes 10–12 large buns
Takes 1 hour 20 minutes
Ingredients
500ml milk
30 grams fresh yeast (you can also use 3 tsp dried yeast, but Ania prefers fresh)
2 tsp granulated sugar
500g plain flour, plus 3 tbsp extra for the milk pan
½ tsp sea salt
2 medium eggs, beaten
1 tbsp vegetable oil
For the sauce
400g blueberries (fresh, or frozen and defrosted)
2 tbsp granulated sugar
Method
Warm the milk gently in a medium saucepan. Take off the heat and transfer ⅔ of the milk into a jug and set aside (you will need this to loosen the dough with later).
Crumble the fresh yeast into the pan and stir in the sugar and 3 tbsp flour. The mixture should be the consistency of double cream. Put a lid on the pan and leave on the kitchen counter to double in size.
Meanwhile, combine the 500g flour and the salt in a big mixing bowl and pour the eggs into a well in the centre.
Once the mixture in the saucepan has doubled (about 6 minutes), pour it into the well too. You can tip a little of the extra milk into the pan to swish out the remaining yeast if you like.
Mix everything together with a spoon to combine; this is where you may need to add more of the warm milk, a little bit at a time – you want it to be a firm but sticky dough that easily forms a ball. Then start to knead – you can use a little bit of flour to coat the dough so it’s easier to handle, but try not to add too much more, as it could make your buns less fluffy. Ania says to knead and beat the dough with your whole arm strength for about 5 minutes until smooth and stiff with no lumps.
Add the oil and take another minute or so to incorporate it. Now the dough should be soft and shiny. Sprinkle with flour and cover with a clean, damp tea towel. Leave in a warm spot to rise for 20 minutes. Ania says that in the summer this might be quicker, and the opposite for the winter.
Keep a few blueberries aside for decoration and whizz the rest together with the sugar in a bowl using a hand blender. Some people cook the blueberries down, but Ania likes to blend them from fresh.
Once it’s risen, turn the dough out onto a floured surface. Shape into a long, even sausage shape. Cut this length into 10–12 equal pieces (they should be about palm- sized) and roll into balls between your hands, tucking floury sides under in inside if they are stopping the ball from taking shape. Space the balls out on the board as you go, and when you’re done, cover with a tea towel and leave for 5 minutes to rise. Either use a steamer pan or build your own, like Babcia, who filled her saucepan with 2cm of hot water and covered it with a clean cotton tea towel, held taut with string – this will be the steaming platform. Put on a medium heat.
Pop the buns in batches onto the steaming platform 3cm apart, cover with a lid (or if you’ve gone DIY, with an upturned similar-sized saucepan or metal bowl) and steam for 10 minutes. If you’re using a metal steamer you may want to lightly rub with oil to stop the buns sticking.
When done, remove the buns from the steamer onto plates, leave to rest for a minute, serve with a drizzle of the blueberry sauce and a few fresh blueberries on top.


Shewa's Eritrean Lentil Curry (Tum'tumo)
“Food is important. It’s like fuel to a car but we shouldn’t be too obsessed about it. As long as you have something to eat, that’s the important thing”.
Tum’tumo is best made with berbere, an intense terracotta-coloured spice blend that Ethiopian and Eritrean recipes use for big flavour. Shewa has great bags of it in the kitchen and says that if you can't find it in big supermarkets or ethnic stores, it can happily be replaced by cayenne pepper. Shewa also uses a spice blend she makes by throwing an equal measure of nigella seeds, cardamom, cloves and ajwain seeds into a coffee grinder for a quick blast.
Shewa served the tumtumo with kale steamed with garlic and bay leaves, and another dish of mustard leaves and spinach boiled with bright orange squash. These sat atop the iInjera, the sour, pancake-like flatbread Eritreans use as base plate and cutlery in one.
We all ate with our fingers, gathered around one large injera, spooning blobs of curry onto its airy surface, tearing and gathering as much as possible in one pinch, guided by Shewa the Expert Ripper. Never has anyone made hand-eating look so elegant while moving us to tears with remarkable stories.
Feeds 4–6
Takes 20 minutes, plus optional soaking time
Ingredients
400g red lentils
1 tbsp berbere spice mix (see mix below)
1 tbsp sunflower oil
2 onions (red or white), finely diced
3 garlic cloves, finely chopped
2 tsp sea salt
For the berbere spice mix (makes about 75g)
1 tbsp dried chilli
1 tbsp nigella seeds
1 tbsp cardamom, shells removed
1 tbsp cloves
1 tbsp cumin seeds
Method
If you have time, soak your lentils for 15–30 minutes before cooking to help with digestion. If not, simply rinse under a cold tap; they will still cook fine.
If you are making your own berbere blend, do this now by grinding all the listed spices together. You’ll have some left to play with in the future.
Heat the sunflower oil in a pan and soften the onions. Add the chopped garlic and berbere, stir for 1 minute, and follow with the red lentils (drained and rinsed, if soaked).
Add boiling water to cover the lentils and then the same amount of water again. Simmer on a low heat for 10–15 minutes, stirring every so often to help the lentils break down and stop it sticking on the bottom of the pan.
When the lentils have broken down and combined, remove from the heat, season with 2 tsp of sea salt and serve.


Clara Maria's Spanish Vinegar-Marinated Chicken (Escabeche)
“The verb 'escabechar' in Spanish simply means to cook and preserve in vinegar, which I like to do a lot, but using only very good quality Spanish vinegar”
We’ve have been lucky enough to have been offered the chance to stay overnight with a grandmother we’re cooking with on a few occasions. Such was the case with Clara Maria, who kindly offered to host us for a weekend at her beautiful home on the outskirts of Madrid. Upon arrival, we were sat out in the garden to wait for Clara Maria, with an aperitif of beers and olives.
Soon enough she emerged from the house, a lady of such grace and class that we barely noticed the cane she needed to support her weight as she moved towards us in greeting. She sat herself down ever so slowly and cracked open a beer. From this moment, we knew we’d all get along.
We spent a weekend tirelessly listening to Clara Maria. We did have the option to head out and explore Madrid but chose instead to spend most of our time curled up on her couch near a roaring fire, absorbing stories of her times as part of the culinary set of the 1950s with Elizabeth David and Julia Childs. Soaking up her views on life. Letting her positivity, her belief in following instincts, sink into our very own philosophies. All between exquisite dishes that exemplified the elegance and finesse that Clara Maria herself embodies.
Feeds 4
Takes 50 minutes, plus chilling overnight
Ingredients
100ml olive oil
500g skin-on chicken: thighs, legs or breasts (whatever your prefer)
1 onion, sliced into 3mm half-moons
½ bulb garlic, cloves peeled and roughly chopped
1 carrot, peeled and sliced in 2mm rounds
125ml good- quality sherry vinegar
400ml chicken stock
1 tsp black peppercorns
4 cloves
2 fresh bay leaves
2 sprigs of fresh thyme
Method
Heat 100ml the olive oil in a non-stick sauté pan.
When the oil is hot, fry the chicken skin-down in the oil until browned (around 8–-12 minutes), then fry the underside for 2 minutes. Remove and set aside.
Add the onion, garlic and, carrot to the oil and fry on a medium heat for 10 minutes, or until soft but not browned.
Return the chicken to the pan and add the vinegar and chicken stock to cover the meat. Add the peppercorns, cloves, bay leaves and thyme and simmer for 20 minutes with the lid on.
Keep in the pan or move to an earthenware or ceramic dish, ensuring the meat is covered with the juices. Allow to cool, cover and then put in the fridge.
Refrigerate overnight and eat the next day – the flavour of the pickling liquid will mellow and the meat will tenderise. Escabeche lasts for up to a week, and the taste of the sherry vinegar softens more over time.
Serve hot or cold alongside buttery boiled new potatoes or crusty bread and pickles.


Zena's Russia-Inspired Turkey Bites (Piroshkis)
“The most esteemed guest to have eaten my Peroshkis at a luncheon is Margaret Thatcher, who was perfectly charming. This recipe goes back very far. My mother was Russian and she taught me to make Peroshkis.”
We know Zena’s granddaughter Olivia. She was there when we arrived at Zena’s Hampstead flat, and they’d gone for a coordinating white shirt with black- ribbon- necktie ‘look’. It was like walking in on a couple of excitable 15-year-olds. We began with tea and biscuits, as is traditional, and quickly got on to the subject of exercise. Zena made the giant claim that she can hold a plank for 300 counts. A few counts later she was on the floor with a cushion under her elbows, proving that small people can indeed have extraordinary strength of core (and mind).
Her flat was impeccably presented. China was placed with precision and every cushion plumped to the max on the big cream sofa, which almost engulfed her when she sank into it for her portrait. She cooked with a choreography of small, delicate movements, as if her hands were barely touching the ingredients. Then out came these bold snacks, which we ate while warm, and quickly lost count of how many we’d had.
We never push grandmothers to do a recipe that isn’t intrinsically connected to them, so we were very happy to go with Zena’s take on piroshkis (more a turkey sausage roll than traditional piroshki). But when she told us the secret to the sneaky version of the sauce – a mix of ketchup and brown sauce – we did have to ask her to share her more elaborate ‘home-made’ version. You choose which one to use.
Makes 20
Takes 50 minutes
Ingredients
1 medium onion, finely diced
1 tbsp coconut oil
300g turkey mince
1 x 320g pack ready-rolled puff pastry
1 egg, beaten (to glaze)
For the tomato sauce
200g tinned chopped tomatoes (half a tin)
1 tbsp soft brown sugar
1 tbsp tomato purée
2 tbsp balsamic vinegar
2 tbsp Worcester sauce
For Zena’s quicker, sneaky sauce
3 tbsp tomato ketchup
3 tbsp HP or other brown sauce
Method
Preheat the oven to 200°C/180°C fan°C/gas 6.
In a pan, combine the tomato sauce ingredients. Break down the tomatoes with a fork and reduce down to a ketchup consistency for about 10 minutes. Add salt and pepper to taste.
Meanwhile, fry the chopped onion in the coconut oil until browning and then add the mince, stirring and breaking up the meat with a wooden spoon until cooked through.
Add all the sauce to the mince and stir together (or seasoned ketchup and brown sauce, if you’re cheating). Set aside to cool.
Lay your piece of ready-rolled puff pastry on a lightly floured surface. Slice it in half lengthways.
Take one half of the pastry and place half of the mince mixture neatly along one of the long edges, leaving a 1cm gap between the filling and the edge of the pastry.
Brush the 1cm edge with a little water (Zena uses an ice cube!) to help it stick.
Fold the opposite edge over and around the meat, tucking under slightly, to meet the moistened egg-washed side. Squeeze slightly to ensure the pastry is stuck and the meat is enclosed. Roll the pastry over so the join seam is underneath.
Cut into 10 pieces (around 3cm each) and place on a floured baking tray.
Repeat with remaining pastry and mince, and brush the top of each roll with the remaining egg wash.
Bake in the oven for 20 minutes until golden on top. Serve with a glass of bubbles.

Read Zena’s interview here

Tigger's Africa-Inspired Peanut Chicken Stew
“When Tim (my husband) and I lived in Uganda in the late 1950s, we’d have this Peanut Chicken stew almost every week. He was a doctor over there and I delivered Iodine oil capsules to remote villages.”
We were introduced to Tigger through her artist daughter, Charlotte. Tigger lived in London’s trendy Hackney neighbourhood way before people ponced around with rolled- up jeans, pink socks, take-away coffees and Danish buns. Her house was modest and cosy with loads of books, African artefacts and a neat line of framed photos of each of her 16 grandchildren in the hall.
We went to visit Tigger for an introductory cup of tea and ginger biscuit. It was a little awkward; we were nervous. Tigger wasn’t sure. She kept saying, ‘But I haven’t had a career and I just improvise with whatever food I happen to have available.’ We sat on the sofa, Tigger opposite in a chair. Within the hour, slightly over the tea limit, something clicked and we ended up squeezed together on the sofa with a photo album, Tigger exclaiming, ‘It’s like we’re on a bus!’. We set a date for two weeks later.
Tigger had painted the wall behind her white Aga a deep Yves Klein blue. She told nearly all her stories leaning against it, reboiling the kettle for more tea. Iska had a pink wig with her for a party that evening. At some moment it felt right that Tigger should try it on, and so she stood, reciting stories with such sincerity, with a bright pink bob.
Feeds 4–6
Takes 50 minutes, plus marinating time
Ingredients
1 tsp coriander seeds
1 tsp cumin seeds
8 chicken thighs (Tigger prefers skinless for this dish)
5 whole cloves
3 tbsp natural yoghurt
5 whole cloves
8 chicken thighs (Tigger prefers skinless for this dish)
1½ tbsp olive oil
1 onion, diced
4cm ginger, finely chopped
1 garlic clove, finely chopped
½ red chilli, finely chopped
zest of ½ lemon
500ml chicken stock
2 red peppers, roughly chopped into large pieces
2 tbsp smooth peanut butter (with no added sugar)
Method
Grind the coriander and cumin in a pestle and mortar. Put the chicken in a bowl with the coriander and cumin, cloves and and pour the yoghurt, over, adding the cloves and rubbing to make sure all the meat is coated. Cover and leave to marinate in the fridge for 30 minutes.
When the chicken has almost had long enough in the marinade, heat the olive oil in a sauté pan and add the onion to soften for 5 minutes, followed by the ginger, garlic and chilli. Continue to cook for 3 minutes, until the aromas release.
Add the chicken to sear all over, then add the lemon zest and chicken stock and simmer on a low heat for 20 minutes.
Next add the red peppers and peanut butter. Stir and cook for a final 10 minutes.
Check for seasoning before serving with fluffy basmati rice boiled with a couple of cardamom pods.


June's British Steak and Red Wine Pie
“Bobby my son-in-law is always asking me to make him a pie. I’ve had strict instructions not to make him any more though, because of the weight issue. I’ve been making this as far back as I can remember. I don’t actually remember not making it, but it is a bit of an East London dish.”
Feeds 6
Takes 4 hours 15 minutes
Ingredients
2 tbsp olive oil
2 large onions, chopped
2 garlic cloves, chopped
1kg stewing beef, chopped into large chunks (shin and skirt are good, but if you’re feeling really fancy, June insists rump steak is the best)
4 tbsp plain flour
5 bay leaves
1l beef stock
125ml red wine
1 x 500g block shortcrust pastry
Not sure if you need both plain and white.
Method
In a large sauté pan, brown the onions and garlic in 1 tbsp oil.
Put the beef in a large bowl and sprinkle with the flour. Stir to coat.
Remove the onion mixture from the heat, transfer to a bowl and place the beef into the same pan with the remaining 1 tbsp oil. Brown the beef for 2 minutes, stirring, to seal in the flavours.
Add the onion mixture back into the pan along with the bay leaves. Pour in 1 litre hot beef stock and simmer gently for 3 hours with the lid on. Add the red wine and stew for a further 30 minutes (June says don’t put this in any earlier as it could make the meat tough).
Grease and flour a 20cm pie dish and preheat the oven to 200°C/180°C fan/gas 6.
Cut ⅓ off your block of pastry and set aside for the lid. Roll the other remaining ⅔ out to a size that will easily line the dish with a little extra over the edges. Place gently into the dish, and press lightly the into the corners and fold the inside edges round and over the edge of the pie dish slightly.
Scoop out the pieces of beef with a slotted spoon (you don’t want too much sauce in the pie), let cool a little and place into the pie dish – it should look nice and full and be slightly higher than the rim. Save the juices to serve as gravy with the pie.
Roll out the remaining pastry and place on top, pushing down to join it with the under layer. Cut away the excess and add fork lines around the edge. Decorate your pie as you like with the excess pastry (June made a little 15cm plait – why not?).
Bake for 45 minutes, until beautifully golden brown. Rest for 10 minutes before unclipping the sides of the tin and serving.


Jenny's British Queen of Puddings
“I haven’t bought a loaf of bread in 40 years or a jar of jam. I think it’s important for a mum to know how to do all of these things.I learned how to do preserves. I also learned how to rear and butcher a pig.”
Jenny gave us some pretty wild instructions down the phone on how to arrive at her house in a quiet British village a few hours out of London. We had assured her we only needed a postcode to pinpoint her with the sat nav, but she insisted on reeling off the directions she had memorised all of her life, down to which coloured gate to turn at and which tree to stop at following turning right at the school.
On a typically soggy day for southern England, we were welcomed into the warmth of Jenny’s kitchen, thoroughly toasty thanks to an old Aga oven that is never switched off. She was fresh from her daily three- hour ramble with Toby the terrier, so dripping wet in an anorak, she let us in, past the chainsaws and the jam cupboard, for a cup of tea and an afternoon of meringue making.
Hardened in her country manner but soft and maternal in her sentiment, Jenny let us in on so many secrets this day. In spite of being a seasoned chainsaw wielder, she’s also a committed mother and grandmother. She laid on an enormous spread for us and admitted her relationship with her own mother had been so fraught, that it had taught her to be a better mother to her own children. She had never had dessert as a child, so in her adult life, in role of mummy and granny, she became The Queen of Puddings, whizz with a whisk and master of all things sweet.
Feeds 6
Takes 1 hour 10 minutes
Ingredients
25g unsalted butter, plus extra for greasing
600ml whole milk
zest of 2 lemons
90g caster sugar, plus extra for dusting
150g homemade white breadcrumbs (great for using up stale bread)
3 eggs, separated
6 tbsp raspberry jam (Jenny’s was homemade, of course)
Method
Grease a 22cm pie dish with a little butter and preheat the oven to 180°C/160°C/gas 4.
Warm the milk in a medium saucepan, then add the butter, lemon zest and 40g caster sugar. Stir until the sugar has dissolved.
Now mix in the breadcrumbs and turn off the heat. Leave for 15–20 minutes to soak and cool a little.
When the time is up, whisk the egg yolks in a small bowl and stir them into the cooled mixture. Then pour everything into the buttered pie dish and put in the oven for 30 minutes to cook until set.
Remove from the oven and put to one side while you whip up the meringue. Using an electric whisk, beat the egg whites in a clean bowl until stiff enough to hold over your head. Whisk in the remaining 50g caster sugar.
Take your pie dish and spread a layer of raspberry jam over the custardy base. Then spoon the meringue mixture on top of this, spreading it from the middle outwards.
Sprinkle with 1 tsp caster sugar and bake for 15 minutes, or until golden brown and slightly crisp on top.
Serve warm from the oven with cream, ice cream or custard.


Rajni's Gujarati Vegetable Curry (Sambhariya)
“If I don't like someone's food, I wont eat it. The day before yesterday, my friend told me, 'my curry is the best' I said NO! My curry is best! I don't want to eat your curry.”
Having launched this project with our own two grandmothers, Rajni was our first ‘unknown’ and thus most nerve-wracking. We didn’t yet have our ‘routine’ nailed, and we’d driven all the way to an unknown street in Leicester, trusting her granddaughter Ria’s insistence that Rajni was a culinary legend. Ria was not biased; the nerves evaporated and it was one of our favourite days. We went straight into the kitchen, already full of flavour, and watched her casually make three curries, lassis and dessert in a sort of narrated performance, wearing a beautiful turmeric-coloured sari.
These photos by Ella are still some of our absolute favourites. At one point we had her down on her knees with the incredible spread laid out on the floor, all elegant hands and heavy gold bangle, pretending to serve her curries. She was very game and patient. Finally we all sat down: the three of us, her sister, daughter and granddaughter (husband banished to the study for the duration). We sat around the table for about two hours, sharing food and stories.
To this day, in any yoghurt-based scenario we still quote Rajni, who was absolutely insistent that yoghurt is the secret to eternal youth.
Feeds 8 as part of a thali (or 4 as a main)
Takes 45 minutes
Ingredients
8 tbsp sunflower oil
500g new potatoes
2 aubergines, cut into large chunks
2 green peppers, roughly cut into 3cm squares
450–500g small red onions, peeled, with a cross shape cut to the centre
For the cooking spices
2 green bird’s-eye chillies, whole with a small slit made in the side
2 tsp mustard seeds
1 tsp fenugreek seeds
½ tsp asafoetida
5 dried curry leaves
For the masala
80g chickpea (gram) flour
2 tbsp fresh coriander, stalks removed and leaves finely chopped
1 tbsp ground cumin
1 tsp turmeric
1 tsp chilli powder
2 tsp salt
2 tsp caster sugar
Method
Par boil the new potatoes.
Prepare the masala by combining all the ingredients in a mixing bowl and set aside.
In a frying pan heat ½ tbsp sunflower oil. Add the masala and toast the mix to bring out the flavours, stirring constantly for 5 minutes until it is more yellow in colour, then take off the heat.
Put 4 tbsp sunflower oil into a large pan on a medium–low heat. Add the drained potatoes and put the lid on and cook for 8–10 minutes, or until they have started to soften and turn golden in places. Shake the pan so the potatoes get heat on all sides.
Put the cut-up aubergines and peppers into a bowl. Stuff some of the masala into the cut into each of the onions you made, pulling apart the cut to stuff as much as you can (about half the mix). Do this over the bowl of vegetables so no masala is wasted.
Next, turn the heat down on the potato pan while you add all the cooking spices. Heat for 2 minutes, until they crackle and release their scent.
Now add the stuffed onions, aubergines and peppers. Sprinkle over 2 tbsp marsala mix and two 2 more tbsp oil. Stir gently to coat and put the lid on again. Cook on low heat until the veg is nearly soft (around 25 minutes). Keep an eye on it in case it starts sticking (it always does a bit, says Rajni). If it’s sticking, turn the heat lower, add a little more oil and a splash of water if necessary.
When the veg is soft, add the remaining 2 tbsp oil and sprinkle in the rest of the masala and stir to coat. Cook for 5 minutes more for the mixture to really stick to the veg and warm through. Test the seasoning and serve with lots of yoghurt, fresh coriander and chapati as a main, or to create a proper Indian thali like Rajni you could also add a serving of raita, a simple red lentil dahl, rice and a lassi.


Nicole's French Cointreau Orange Tart
“My grandmother used to make this orange tart. It’s her recipe and I learned to cook it in her kitchen along with all my aunties.”
We were introduced to Nicole through her son Alfred (master mixologist and heir to the Cointreau empire). The family kindly sent us Eurostar train tickets and hosted us at their beautiful home in Angers. On arrival, we made our way down a long, tree-lined driveway to an old converted barn with a bright, open kitchen at its core.
The whole weekend was a poem in orange: giant pumpkins in the greenhouse, Nicole’s Cointreau-colour-matched skirt, the iconic orange of the Cointreau bottle, and an army of us in the kitchen juicing lemons oranges for tarte d’oranges. It was November but we spent our time outdoors, wading through a thick leaf carpet to find the right shot of Nicole amongst the autumn trees, baby granddaughter Louison to incite extra giggles.
Nicole and her husband spoke limited English but we seamlessly laid the table in unison and all sat down together, using food as a medium for hilarity and storytelling. Cultural differences were showcased when the cheese board came to us first and we cut hunks of fromage double the size of theirs; ‘hungry English girls’ isn’t a very classy title.
This is, however, a classy little custard tart. It can be made with or without Cointreau and served with afternoon tea or as a dessert.
Serves 8–10
Takes 1 hour, 25 minutes
Ingredients
150g unsalted butter, softened
100g caster sugar
1 egg
200g flour
For the filling
100g caster sugar
2 large eggs
juice of 2 oranges, juice only
2 tbsp Cointreau
For the topping
2 oranges
brown sugar for dusting
Method
Preheat the oven to 180°C/160°C fan/gas 4 and grease a 25 cm tart tin or dish and set aside.
Cream the softened butter and sugar together in a bowl, then beat in the egg until well combined.
Slowly mix in the flour and a pinch of salt until the mixture comes together. Shape the dough into a disc (this will make it easier to spread out into your tart case later), and wrap in cling film and chill for 30 minutes in the fridge to firm up a little.
Meanwhile make the tart filling. Whizz the sugar and eggs together in a blender, add the orange juice and Cointreau and blend again – it will be quite a liquidy mix, but that’s OK. Set aside.
Next slice the top and bottom off your remaining oranges you’re using for the topping with a sharp knife, so you have a flat base to sit them on. Then slice down the sides to remove all the peel and cut the orange into 2–3mm-thick rounds (each orange should make about 8).
Once chilled, unwrap the dough and place it into the base of your tart tin. Use your fingertips to gently push the dough, coaxing it up the sides so it covers the tin evenly. Cut off any excess dough and prick all over with a fork.
Fill the tart case with crumpled greaseproof paper and baking beans (or dried pulses). Place in the oven and bake for 15 minutes. Remove the paper and beans and cook for a further 5 minutes or until slightly browned. Don’t be alarmed if the sides shrink a little.
Next, pour the filling into the tart case, arrange the orange slices on top (they will sink – not a problem). Return to the oven for a further 20 minutes and when the filling is almost set, sprinkle a generous layer of brown sugar over the top of the dish. Return to the oven for another 10 minutes, until set and the sugar has caramelised on top.
Leave for a few minutes to cool a little, then serve warm or cold with chocolate mousse, ice cream or cream.
Tip: Nicole has a special spray bottle of Cointreau, and she finishes this tart off with a single spray. Copy her and make one at home for a final burst of bright, bitter, zesty orange.

Read Nicole’s interview here

Lally's German Schnitzel and Granny Carrots
“I was once invited to dinner by an Austrian lady who thought she knew everything about food and she told me to really enjoy a schniztel properly, you just have a nicely dressed salad with it.”
Iska’s grandmother, ‘Lally’, is a slight lady now and much less adept at getting around than she once was. She wears thick glasses and struggles to make out shapes. Still, her dress sense is impeccable and she has an air of refinement about her that can be quite intimidating (much like Iska), regardless of her age.
She may well have been born in Germany to German parents but not a trace of her heritage remains in her accent. A clipped received-pronunciation English betrays nothing of her past, which spilled out over a weekend spent sipping tea and chopping ‘granny carrots’ with her in her bright, modernist-feeling Exeter home in the UK.
While Iska and our photographer, Ella, fiddled with food styling in the kitchen (you don’t want to know what happened to that beer to keep it fizzy for the photo), Lally and I took to the living room for a brew. I couldn’t have prepared for the emotion that our chat would solicit from me. It wasn’t the Nazi stories, the nostalgia over a first boyfriend, or the cruelty she faced after fleeing Germany that led to my locking myself in the bathroom and bursting into tears. It was the way she described the loss of the husband she had held so dear and the moment she walked into the room to hear the nurse say his heart had stopped beating. ‘That was like an explosion,’ she told me, and my own heart felt an aftershock from that impact.
(Anastasia on Iska’s grandmother)
Red Cabbage
Feeds 4–6
Takes 1 hour
Ingredients
100g butter
½ white onion, finely sliced into half-moons
1 red cabbage, quartered, with heart removed and leaves finely shredded
½ cooking apple, grated
2 garlic cloves, finely sliced
generous pinch nutmeg
3 tbsp balsamic vinegar
3 tbsp white wine vinegar
1 tsp brown sugar
5g (or small handful) whole juniper berries
juice of ½ a lemon
Method
Put the butter into a pan on medium heat to melt. Add the onions and soften (around 10 minutes).
Next, add all the red cabbage and carefully stir to coat in the butter.
Add all the other ingredients, season, stir and leave to cook on a low–medium heat with the lid on for 40–50 minutes, until soft.
Stir every so often to ensure the cabbage doesn’t burn on the bottom of the pan. Taste and adjust seasoning, if needed, before serving.
Schnitzel
Feeds 4
Takes 30 minutes
Ingredients
4 pork leg escalopes
2 tbsp plain flour
1 egg, beaten
6 tbsp white breadcrumbs
100g butter
Method
Blot the pork with kitchen towel to ensure it’s dry.
Use a meat mallet or rolling pin to bash the meat all over on both sides to flatten. It should be around 1 cm thick, or less.
Prepare three plates; the first with flour, the second with beaten egg and the third with breadcrumbs. Season the breadcrumbs with sea salt and freshly ground black pepper.
Get a spare dish ready and begin to pass each of the escalopes through the flour, egg and breadcrumbs, making a finished pile on the plate.
Melt a knob of butter in a large frying pan and sizzle the schnitzels for 3–4 minutes on each side, or until golden brown and cooked through. You may need to do these in batches; if so, keep the finished schnitzel warm until ready to serve.
Granny carrots
Feeds 4–6
Takes 30 minutes
Ingredients
150g butter
½ white onion, diced
6 carrots, peeled and cut into small 0.5cm squares
1 tbsp granulated sugar
juice of ½ a lemon
handful fresh parsley, finely chopped
Method
Gently melt the butter in a pan and cook the onion for around 10 minutes, until nice and soft.
Add the carrots, sugar and lemon juice, all the other ingredients, plus salt and pepper, stirring to coat.
Cook on a medium heat with the lid on for 15 minutes, or until the carrots have softened but still have a little bite to them. Stir in the parsley and serve.

Read Lally’s interview here

Yiayia's Greek Marinated Seabass and Skordalia
“We would hang our herbs to dry out in the sun and my favourite smell was always that of oregano.”
Yiayia is an original legend: fire master and cucumber whisperer with the strongest calves in Perivoli village. Now she’s a local celebrity after her film got 4.7 stars on film platform, Nowness.
We’ve been to Corfu a few times now, to film, cook and photograph Yiayia (a diva attitude is starting to show). The minute we get into her village, family members start appearing, from behind bougainvillea bushes, through beaded curtains, rising from their plastic chairs – approaching our Anastasia and embracing her. The biggest hug comes from Yiayia Anastasia, cheek bones smashing from the force of the two kisses. Hugs turn to abuse quite quickly. Last time she told Ana to tell me that my bum was much bigger than the previous year and then broke into hysterical laughter as this information was translated.
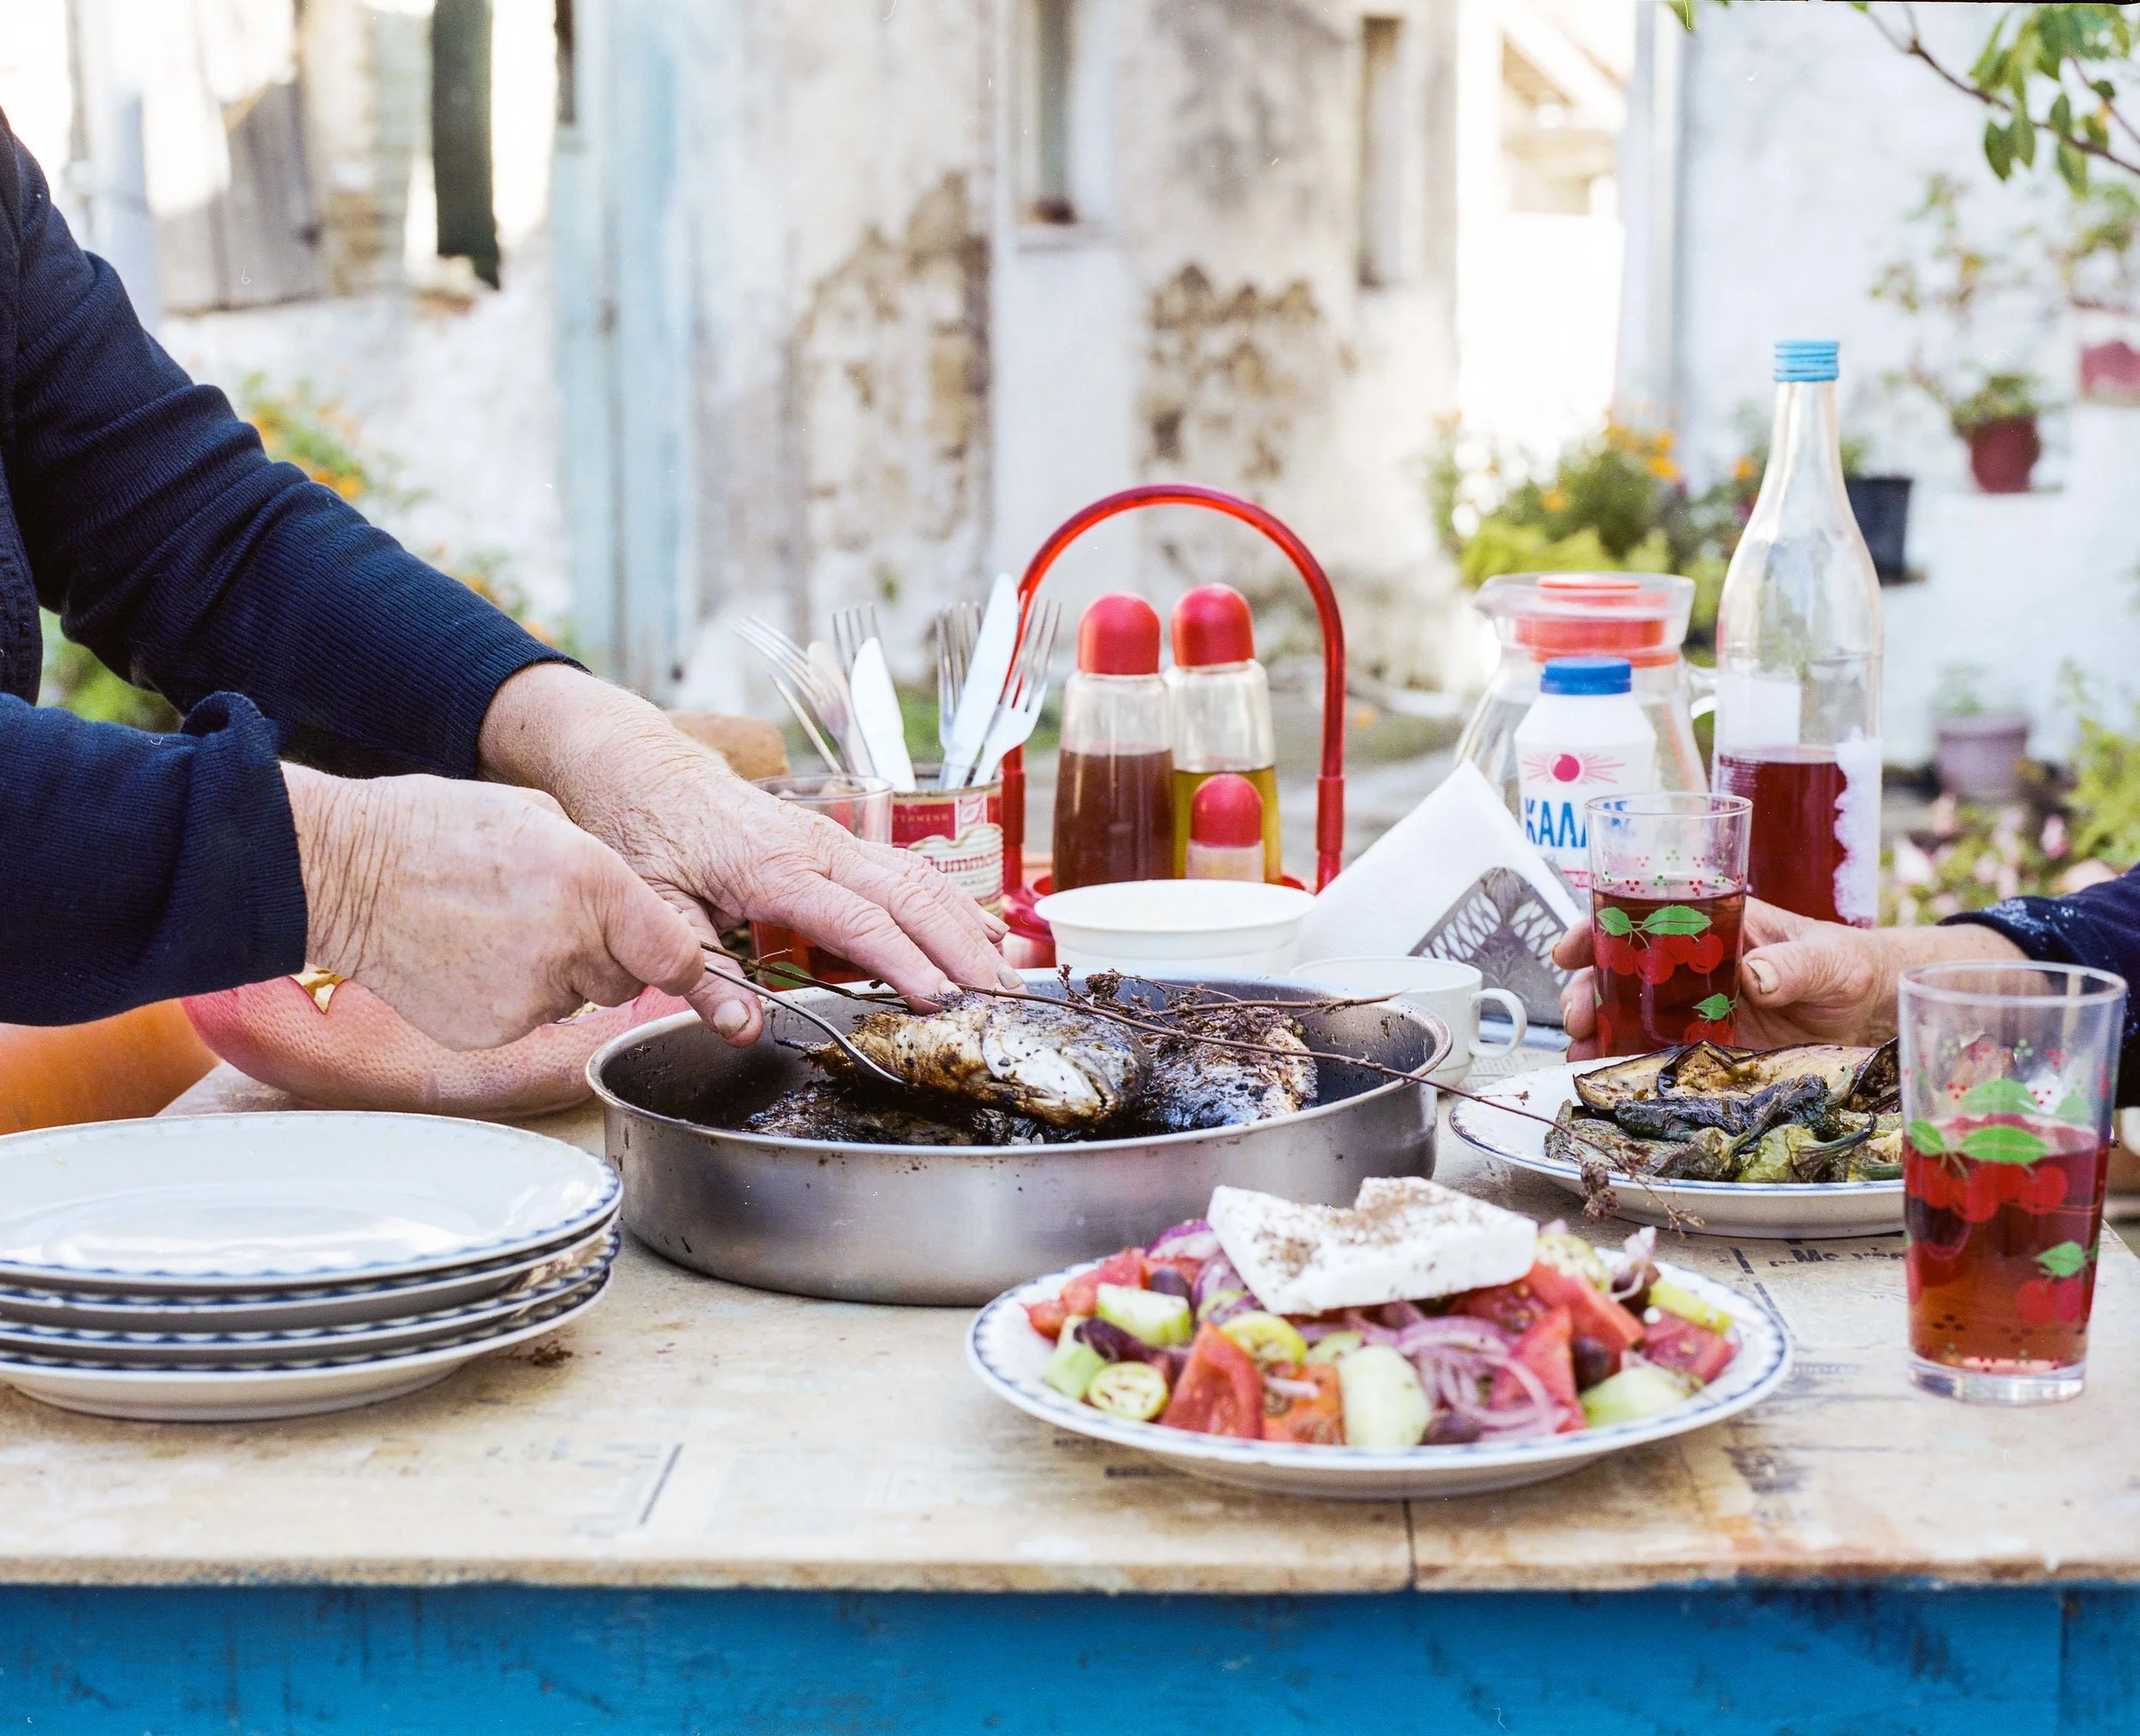
It’s better for everyone that she keeps her manipulations to the fish, which she prepares with great prowess, then slips them into the fire at exactly the right moment, flicking olive oil across their bodies with her stick of dried oregano. With Greek salad made with her own tomatoes and cucumbers, chips cooked in her own cloudy olive oil (when else do you get such luxury?), fresh lemon juice and a blob of skordalia, it really is Yiayia on a plate. We’ve styled, photographed and filmed this dish so much it’s become almost iconic.
Don’t be tempted to put the potatoes for skordalia into a blender. It will resemble wallpaper glue and cling to the roof of your mouth. We made this mistake when cooking a Yiayia-inspired supper for 40, and Yiayia was both cross and disappointed when she heard.
(Iska on Anastasia’s grandmother)
Marinated Sea Bream
Feeds 4
Takes 25 minutes
Ingredients
4 medium whole sea bream, gutted and descaled
1 tbsp sea salt flakes
2 tbsp dried oregano
15 tbsp olive oil
6 garlic cloves, finely chopped
juice of 1 lemon
Method
With a sharp knife make 3 or 4 incisions along each side of the fish and rub all over with sea salt flakes before placing in a large dish.
In a bowl, prepare the marinade by combining the oregano, olive oil and garlic.
Spoon the marinade over the fish, rubbing the mix all over and inside the fish to coat.
Cook the fish over a fire, on a barbecue or under a hot grill for about 8–10 minutes on each side, until the skin is blistered and the fish cooked through.
Squeeze the lemon juice over just before you serve (don’t add during the cooking, as it makes the fish stick to the grill).
Garlic dip (skordalia)
Feeds 4–6
Takes 35 minutes
Ingredients
8 medium floury potatoes, peeled and halved
1 whole bulb garlic, cloves separated and peeled
100ml olive oil
juice of 2 lemons
Method
Boil the potatoes in a large pan of salted water for 15–20 minutes, or until tender. Drain and leave to steam in the pan for a moment.
Bash the garlic cloves in a pestle and mortar until they form a paste, or finely grate. Yiayia’s pestle and mortar is a thing of wonder and big enough for her to add the potatoes, but if yours isn’t, simply transfer the garlic into the potato pan with the olive oil and mash or blend gently with a hand blender until smooth.
Finally, add the lemon juice and season to taste. Then add a little bit of water at a time, until it reaches a runny consistency. Serve with an extra trickle of oil on top, if you like.
Greek Salad
Feeds 4
Takes 15 minutes
Ingredients
1 cucumber, roughly chopped
3 large ripe tomatoes, roughly chopped
½ red onion, finely sliced into half-moons
25 kalamata olives
1 long green pepper, sliced into rings (optional)
1 x 200g block feta cheese
½ tsp dried oregano
6 tbsp extra virgin olive oil
2 tbsp red wine vinegar
Method
Place the chopped cucumber, tomato and red onion into a bowl, add the kalamata olives and mix together.
Spread out onto a serving dish and top with the slices of green pepper, if using, followed by a huge slab of feta and a sprinkling of oregano.
Layer on lashings of olive oil and a sprinkling of vinegar. Put it straight on the table and let everyone break off hunks of cheese as they serve themselves.