Stuffed Romanian flatbreads with braised cabbage by Ana Rusu's Bujor Maria

As a kid, I loved to watch the first flatbread being cooked. My grandma always knew I would ask for the first one, so she had a plate prepared for me. Almost burning my fingers, I would sit quietly and enjoy it, focusing on the rich taste, and wiggle at the pleasant contrast of the ice cold sour cream on top of the hot, steaming flatbread. The cabbage filled ones still are my all-time favourites (and they were my granny’s as well).

She would make them regularly and always have a few other fillings so everyone could pick their favourite: cooked potatoes mixed with sweet sauteed onions, salty and umami cheeses mixed with dill and green onions, or fresh cottage cheese mixed with sugar and loads of vanilla and lemon zest.

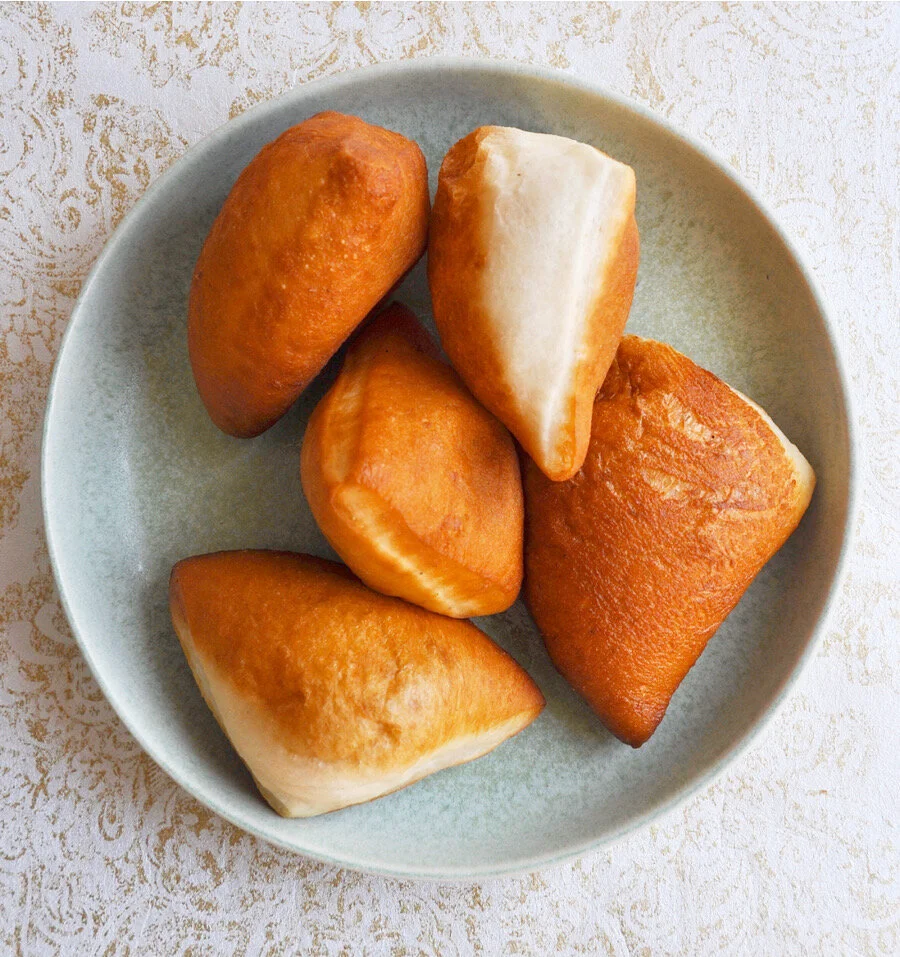
For me, these Stuffed Flatbreads are a symbol of my region, Transylvania, as well as my family. They are more like a snack, a super comforting one. It’s a type of food that equally excites both children and adults.

I love making them exactly how my grandma taught me: as thin as possible, with as much filling as I can stuff in. They are impossible to resist!

MAKING PLĂCINTE

(Vegetarian / plant-based option included)

You’ll need

Braised cabbage filling: 

700 g white cabbage, shredded 
1 medium white onion, finely chopped 
1 ½ tsp salt 
3 tsp finely chopped dill 
1 tsp freshly ground pepper 
3 tsp vegetable oil 

Dough: 

600 g all-purpose flour 
350 ml of warm water 
5 g dried yeast 
30 ml Extra Virgin Olive Oil + 1 tsp 
10 g brown sugar 
10 g salt 

Other: 

200 ml sour cream / greek yogurt (to make it vegan, simply replace with a full fat plant-based yogurt or plant-based sour cream) 

Method

  • Start by preparing the filling: place the shredded cabbage in a big bowl and add the salt. Mix well with your hands so the salt gets well distributed on the cabbage. You can squeeze it 2-3 times, using your hands, to soften it. For now, leave it aside for 10 minutes and prepare the flatbread dough. 

  • In a mixer bowl, add flour, yeast and sugar. Mix to combine everything. 3. Add water, oil and salt. Knead until everything is well combined. If it’s too dry to work with, add no more than 10-20 ml of warm water. Knead for 7 minutes to develop the gluten, or until the dough is smooth and elastic. 

  • Form a ball using your hands and place it on a piece of parchment paper on an oiled surface. 

  • Check if the inside of your bowl is clean enough (with no dough excess) and grease it with 1 tsp of olive oil. 

  • Place the dough back into the bowl and cover well with cling film. Let it proof in a warm place for about half an hour. Depending on how warm or cold your place is, it might take less ( ±20 mins) or more (±45 mins). You will know the dough is proofed when it has doubled in size. 

  • Back on the filling: heat 3 tsp of vegetable oil in a large frying pan. Add the chopped onion and sauté on medium heat, until translucent. 

  • Now you can add the cabbage and cook on low to medium heat. Stir from time to time and cook for about 15-20 minutes or until tender. A good, fresh shredded cabbage usually contains a lot of juice that will help the cabbage to cook in, but if your cabbage is too dry and sticks to the bottom of the pan, add a splash of water.

  • When the cabbage is done, turn the heat off and add the chopped dill and lots of black pepper. Tatse and adjust with salt if needed. Mix well and leave aside to cool off completely. 

  • Time to shape the flatbreads: when the dough has doubled in size, take it out of the bowl and place it on a floured table. Divide into 8 parts and form each part in a ball-shaped dough. Leave them to rest on the table, covered, for 5-10 minutes. 

  • Meanwhile, heat a cast-iron skillet on low to medium heat and lightly grease it with a paper towel. 

  • On a lightly floured surface, roll each piece of dough into a large circle of 18-20 cm diameter that's fairly thin, one at a time. 

  • Take a spoonful (or more) of the braised cabbage, place it in the middle, and spread in the center, leaving 4-5 cm of the edges plain. Then, use the edges of the dough to enclose the filling in a similar round shape. Remove as much air as possible from inside and pinch the dough to seal. Add a bit of flour on top so it’s eary to work with the rolling pin. 

  • Flatten the pockets lightly with your hand and shape again into a disc, using a rolling pin to flatten it out. Try to do it gently, so the dough doesn't break - that will cause the cabbage to come out and burn when cooking. 

  • Place the stuffed flatbread on the heated cast-iron skillet - cook the first side for 2-3 minutes on medium to high heat. Use an egg flip to check if it' s ready to turn: the underside should be golden brown with deep brown patches . 

  • Turn the flatbread over and cook on the other side for 1-2 minutes . 16. Take it out and place it on a wide plate. Cover with a kitchen towel to keep it moist and soft. 

  • Repeat the process for the rest of the ball shaped doughs. 

  • Serve warm or cold with your preferred sour cream or greek yogurt.


Notes: Keep the flatbreads covered well with a kitchen towel at room temperature for up to 3 days. You can keep them for longer in the fridge, and heat them in the microwave, oven or on the stove just before serving.
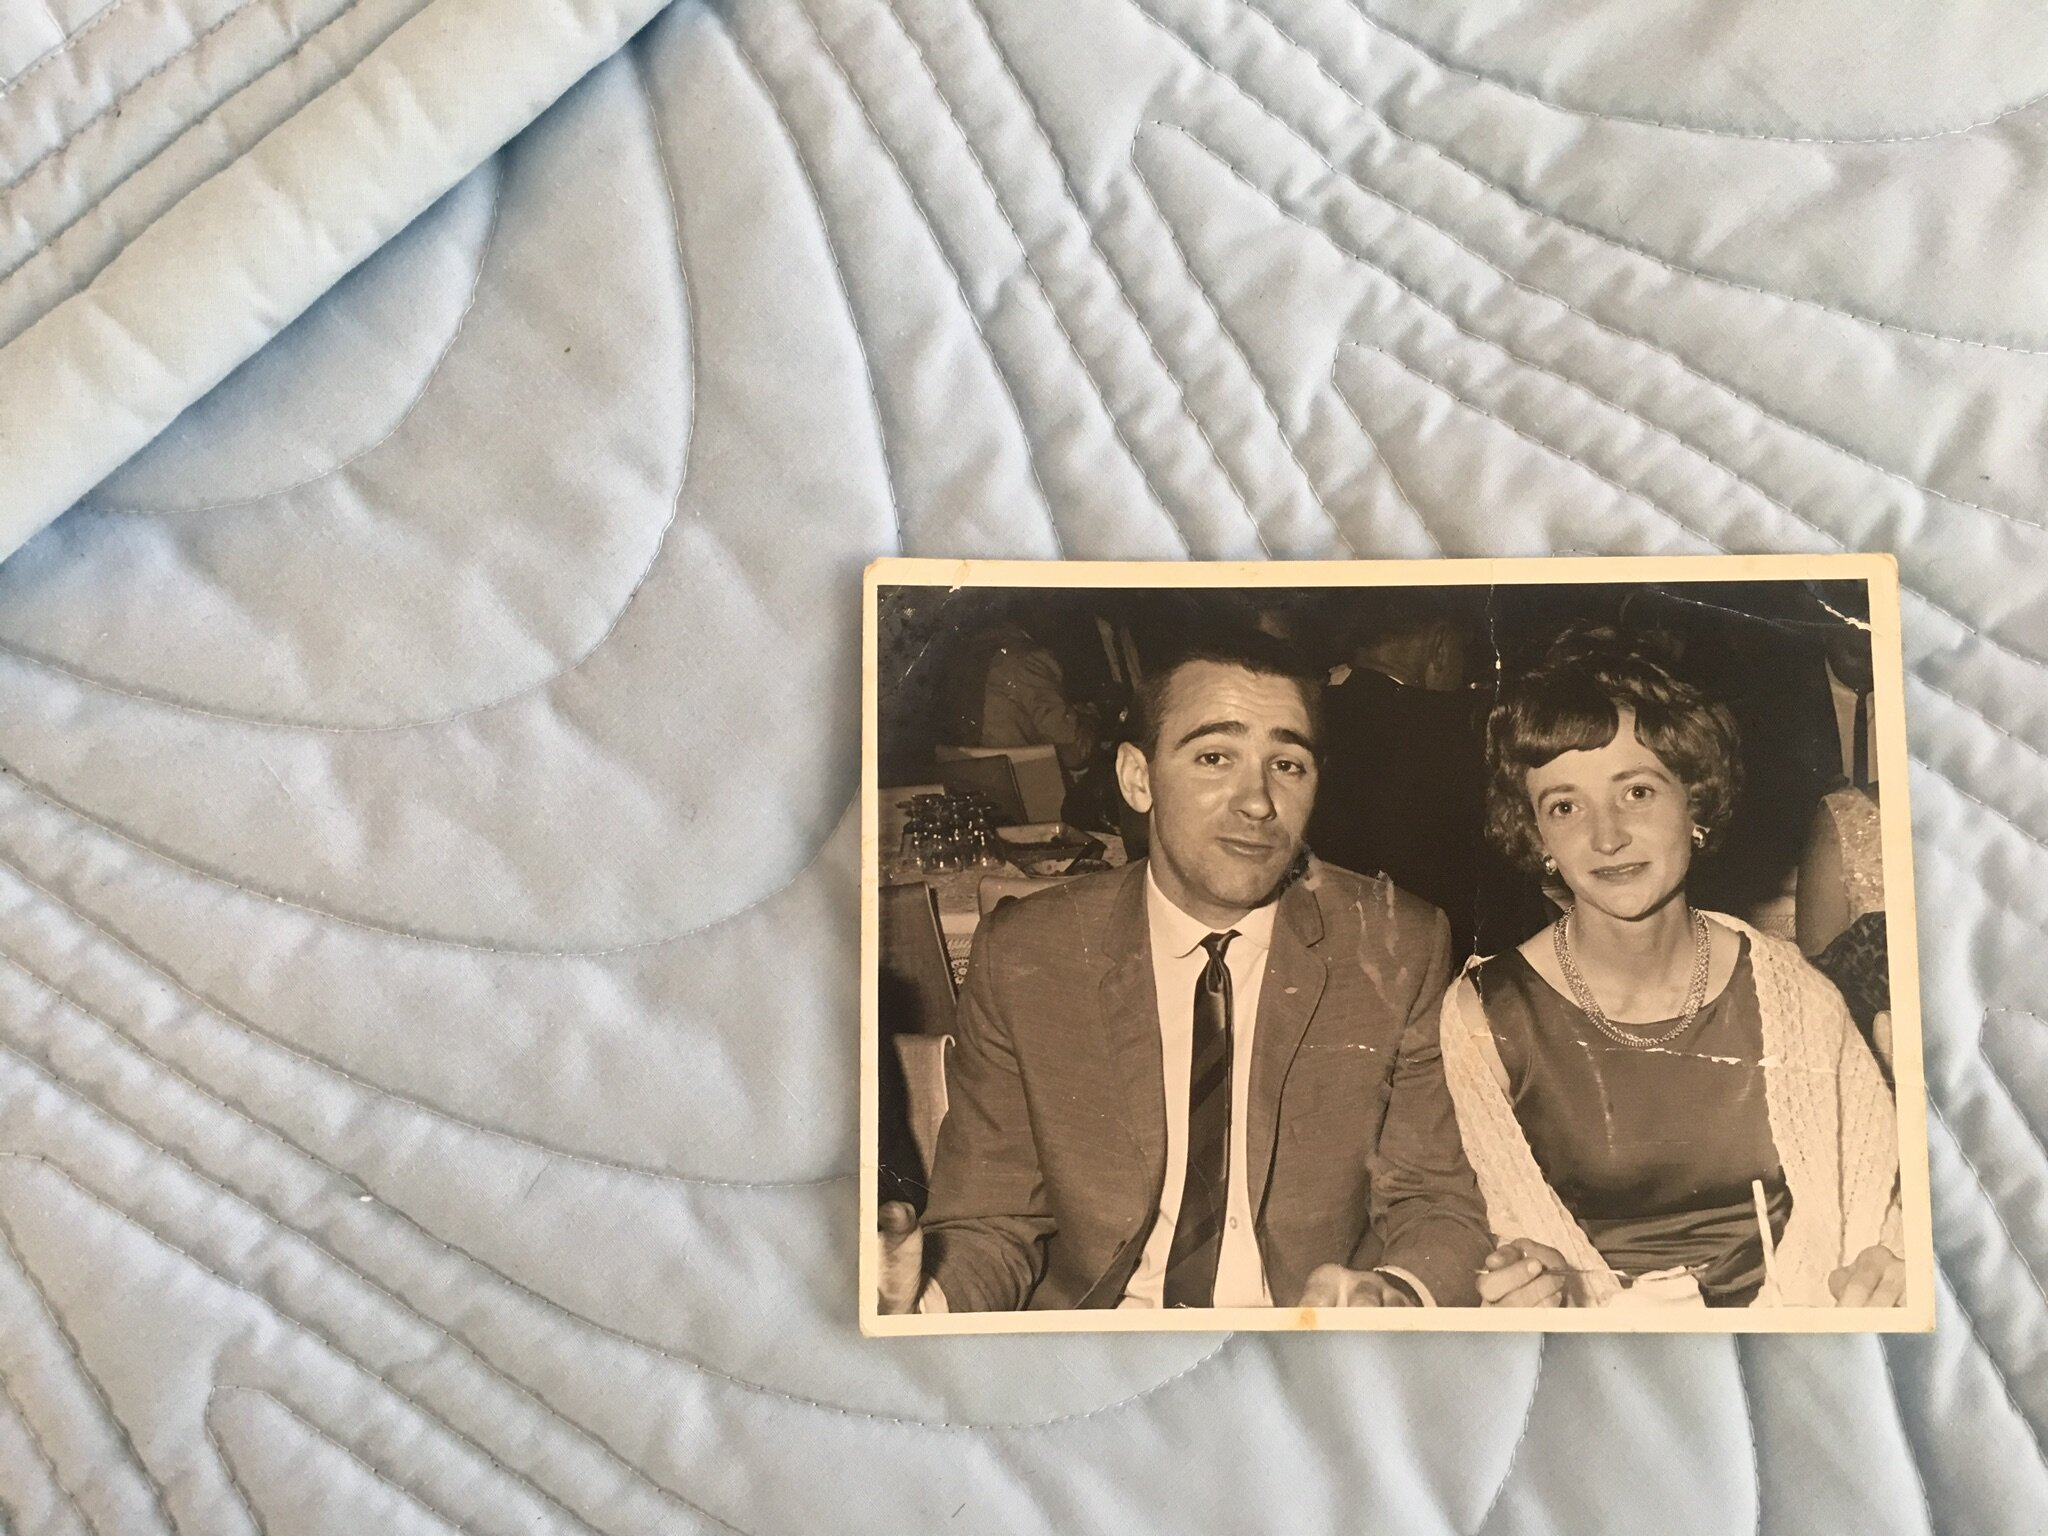
Bujor Maria

Born 1937, Romania

Grandchildren, Adriana, Cristi, Diana, Ana 

My grandmother was a strong and wise woman. She was a master of food and she would cook large quantities, enough for almost three families. As Romanians, we have this reputation of being very hospitable, serving a feast to anyone who comes by, even if it’s a very short visit. 

I remember her taking so much care of the garden and the little chickens; she would wake up in the middle of the night to give them food and water. The garden was organized and abundant until late autumn: from the first spring onions and leaves of spinach, all the way to big heads of cabbage, beetroots and pumpkins. At the back of the garden, we rushed to the apple and plum trees, with their branches weighing down from so many fruits. 

Often worried and stressed about making sense of the injustices around us, she gave her help to anyone in need and she was a problem solver, an optimist, an empath and an upright woman. She was the heart and head of the family. 

In my childhood and teenage years, I spent a lot of time with my grandmother, helping around by doing the dishes, kneading or looking for ingredients to help her — Other times, I was just watching and listening. I was amazed by her cheerfulness, regardless of the infinite chores that she had. 

Now I sometimes catch myself remembering clear bits of a condiment she would add, her words describing a flavour, a cooking technique gesture. Through these momentary acts, she passed me her joy of cooking and something more. 

My grandma passed away in 2019. It was a couple of rough years for all of us but now the sorrow is absorbed by a warm feeling of gratitude; I feel touched and extremely lucky to have had her in my life. 

She would be so happy to know her plăcinte being shared with the rest of the world.

About Ana

A plant-based chef, food stylist and photographer, Ana Rusu was raised in a small Romanian town and cites her grandmother as a main culinary influence in her life. Follow her @herbs_and_roots for delicious vegan and veggie recipe inspiration.

Nonna Chiara's Spaghetti all' Amatriciana

Chiara only recently became a Nonna to granddaughter Elisa. She also happens to be my mother-in-law and seems to be able to whip up a tasty meal (antipasti, primo and secondo) at a moment’s notice. Perhaps it’s the Italian Nonna’s way. Despite Chiara’s aversion to all things green, I still love what she puts on the table. She cooks the way she dresses, with flare, confidence and ease.

This Spaghetti all’Amatriciana is an easy one that Nonna Chiara has learned to rustle up on the quick. When she was working in Milan as a fashion stylist, she was always very busy and needed a go-to dinner that came together with little fuss and effort but yielded maximum results. She insists that you ALWAYS use Guanciale and never EVER break the spaghetti into the pot of boiling water. Her preferred brand is Rummo but she says “anything is better than Barilla.”

Ingredients

(serves 4)

1 small red onion
100g Guanciale
1tbsp Olive Oil
400g tin of chopped tomatoes
1 dried chilli pepper / 1/2 tsp of chilli flakes
Half a tsp of sugar
Pink of sea salt
1tbsp Pecorino Cheese (grated)

Method

  • Prepare your pasta pot - fill it 3 quarters of the way up with water and bring that water to the boil with a Tbsp of salt

  • Chop the onion finely and sizzle on a medium heat in the olive oil

  • Add the guanciale and fry until brown

  • Give the onion and guanciale a stir so that they don’t stick to the pan and burn

  • Add your dried chill at this stage - you can choose to leave it whole or chop it up with the seeds (seeds will make it spicier so be warned!)

  • Once you can see the guanciale has browned off, add the chopped tomatoes

  • Add half a tsp of sugar and a pinch of salt

  • Let your sauce bubble away and in this time, add your spaghetti to your pot of water, cooking exactly to the recommended time on the packet (Nonna Chiara checks hers by tasting it periodically)

  • Once your sauce has cooked down to a thick sugo, turn it off

  • Drain your pasta once its ready, add it back to the larger pot then mix in your tomato sugo

  • Finally, add your grating of pecorino and mix will

  • Chiara serves hers with a Merlot from Marche

An ode to Nanny Judy's Australian Potato Salad by Bre Graham

This potato salad is an ode to my Nanny’s classic potato salad which I’ve come to realise is quintessentially an Australian take on the sorts you find elsewhere. When I was a kid this was the thing that I craved when going over to her house, a constant side-dish to every barbecue alongside sausages and steak. It was the dish I'd request for special occasions, comfort cooking for me always comes in the form of potatoes.

Unlike me, my Nanny Judy doesn't have a big appetite but this is always a winner and was also a favourite of my late Poppy, her husband Barry who was always in charge of the barbecue as Nanny made the salads inside.

When I was growing up, my grandparent's garden was always full of herbs and had a big lemon tree that I spent hours underneath shading from the Sydney sunshine. This potato salad is full of herbs, mustard, and perfectly piquant cornichons. It may look like a lot of dressing when you first mix it together, but I promise the potatoes will absorb it all.

image00003.jpeg

Ingredients

500g of small waxy potatoes
300ml of sour cream
2 teaspoons of wholegrain mustard
6-8 spring onions
1 tablespoon of white wine vinegar
10 small cornichons
A pinch of salt
Black pepper
½ teaspoon of freshly grated nutmeg
The zest of half a lemon
A bunch of tarragon
A bunch of chives

Method

Slice the potatoes in half but don’t peel them.

In a large pot boil the potatoes in salty water for roughly 20 minutes until tender.

In a mixing bowl whisk together the sour cream, mustard, and vinegar.

Grate in the nutmeg and season with salt and pepper to taste.

Finely slice the spring onions, cornichons, tarragon, and chives before adding it to the sour cream mix.

You want about two tablespoons each of the chopped herbs.

Drain the potatoes of all water and add to the sour cream mix stirring to combine everything.

Leave to cool for a few hours before serving. 

Nanny Judy

Born, Sydney Australia, 1944
Grandchildren, Breannan (Bre), Conor, Justin and Issac
They call her, Nanny

image00001.jpeg

About Bre

Bre Graham is a foodie friend I met on a press trip many moons ago in Montenegro. Together we drank wine endemic to the = region and dined on hearty meals overlooking the bay of Kotor.

I was so happy to see her launch Dishes to Delight and even more pleased when she agreed to share one of her Nanny Judy’s recipes with me for Grand Dishes.

Find her gorgeous food photography and delicious recipes over @breaudreygraham on instagram.

Zanzibari Coconut & Cardamom Donuts by Dina Macki's Grandma Bibi

ZanzibariDoughnuts.jpeg

I remember spending time in the kitchen with Bibi as a kid. She’d be cooking huge pots of Briyani, making loads of dough for Chapati as well as a few fried sweet treats for the Zanzibari community. Everyone came to her and she would keep busy in the kitchen for days.

I’d always bother her and ask questions and she would tell me to shut up and then throw me some dough to play with so I could feel busy like her. I would then make sure she fried or baked my creation and then I would give her a list of people I wanted it to go to. She has instilled this idea of cooking and feeding people into me. It’s why I still do it now.

Most of all, Bibi is the Queen of Fried Food. While it may seem unhealthy in Zanzibar they only had stove tops and no ovens so frying was the only form of feeding. To Bibi, fried food isn't bad for her, it’s all she knows. It’s home food. I promise you this woman can fry just about anything and I can also promise it will not taste like it's just been soaked in loads of oil…

‘Mandazi’ are the food I associate Bibi with the most. She makes the tastiest, fluffiest ones and always has a craving for them. She has to dunk one in her tea every night and to be honest I don't blame her because they are the most more-ish things around.

- Dina Macki

Making Mandazi

You’ll need

650g plain flour (+extra for dusting)
215g caster sugar
400ml warm coconut milk
7g Yeast
1 TBSP ground cardamom
1 Egg (optional, I use it if I want them more spongey on the inside)
1 Litre of vegetable or sunflower oil for deep frying


Method

  • Pour the yeast into the coconut milk and allow it to ferment for about 5 minutes.

  • Combine the rest of the ingredients in a bowl.

  • Then add in the coconut/yeast mixture.

  • Knead for 15 minutes by hand or 7-10 minutes in a mixer.

  • Once it has come together, is smooth and there is no flour left, cover the bowl and leave to rest in a warm place for at least an hour!

  • As soon as it doubled in size you can place it onto a well floured surface and begin to shape.

  • Separate the dough into roughly 5-6 pieces (depending how big you want the Mandazi).

  • Knead each piece slightly then shape into a smooth ball.

  • Then one by one take a ball and roll it out into a flat circle. You’re looking for a thickness of a coin or 2.

  • Using a knife or pizza cutter, cut in half each way. Leaving you with 4 triangles.

  • Repeat with the other balls of dough.

  • Then cover the triangles with a clean cloth and leave to rise for another 30 minutes.

  • When ready, heat your oil (it needs to be hot).

  • Then firstly test with one triangle, by carefully dropping it in the oil. It should rise straight to the top and begin to puff up. If so, add in some more, leaving enough room for them to move around.

  • You want them to brown slightly on one side then flip them over to do the same for the other. They say a true test of a Mandazi is to see if it look like it’s about to pop and also have a white rim around the middle. So look out for those signs too!

  • Make sure to keep an eye on your oil, if the Mandazi’s turn a dark brown very quickly, that is a sign to lower the heat.

  • Fry all of them and place on some paper towel to soak up excess oil .

  • Then enjoy with a gorgeous cup of tea!


Bibi

Born 1938, Zanzibar

IMG-6687.JPG
BAAD4DF0-FD54-4BB3-AF67-BB4238B88356.JPG

About Dina

DinaMacki.png

Born and raised in the UK to an Omani & Zanzibari family, Dina Macki is a food writer and developer who draws on her heritage to create food with Middle Eastern flavour.

If you drop by her instagram, you’ll see she’s heavily influenced by her grandma, the inimitable Bibi.

Yiayia's Oregano Fries

Screenshot 2021-07-31 at 4.50.32 PM.png

Is there anything more glorious in this world than a plate of steaming hot chips covered with gleaming salt crystals and a generous sprinkling of oregano? Greeks famously have fries on the side of everything they order at a taverna. Yiayia (my Greek granny and the inspiration behind Grand Dishes) insists on cooking up a plate of her golden oregano chips even when all I want to eat is a salad.

I can’t resist. It’s a staple at any Greek table. The fact is, we love patates tiganites (fried potatoes). 

The key to the perfect Greek fry (golden and crisp on the outside, soft on the inside) is another essential ingredient in Meditterranean cuisine: olive oil. Yiayia uses glugs and glugs of it but I’d have to caveat this recipe with a note to say this dish is for treat days only and the temperature of your olive oil should not reach the smoking point.

That being said, those living in the Med have the highest life expectancy in part owing to their olive oil consumption, so do be generous when you’re frying…

Ingredients

Serves 2-4 (depending on if it’s the only thing you’re eating or not!)

2 large potatoes
1-2 cups of olive oil
Dried oregano
Salt 
(feta optional)


Screenshot 2021-07-31 at 4.42.10 PM.png
yiayiachips.png

Method

  • Peel then cut your potatoes in half lengthways and proceed to slice them into chunky ‘fries’. The rougher the better and take care not to slice them too thin.

  • Soak these in a large bowl of cold water for an hour. 

  • In a wide, heavy bottomed pan or a frying pan with good depth, pour in your olive oil (it should reach up to around 2.5-3cm of the side of your pan) then heat on a medium heat.

  • Drain your potatoes then add to the oil once it begins to sizzle (not smoke!)

  • Ensure your potatoes don’t crowd each other and that they don’t overlap. 

  • Give them a gentle stir after a few minutes so that they don’t stick then after five-six minutes of frying, lower the heat slightly and continue to cook and occasionally turn them over for a further five minutes.

  • If they still haven’t reached a golden tone, crank the heat back up to medium for a final 1-2 minute blast. 

  • With a slatted spoon, transfer the fries to a bowl or plate covered in a couple of thick layers of paper towel to soak up any extra oil and toss with a couple of pinches of sea salt flakes then a generous sprinkling of oregano. 

  • Shake your Greek chips out onto a serving plate and crumble some feta over the top if you fancy an extra salty kick or dip into a smooth, garlic-spiked tzatziki.

    Best served as a side to Yiayia’s grilled seabream. Recipe in the Grand Dishes book.

    Here’s the link to buy!

Cappuccino Panna Cotta with Espresso Caramel inspired by Letitia Clark’s Granmummy Valery

L1410633.jpg

In the late 15th century, Queen Isabella of Spain bragged that she had only bathed twice in her entire life. Based on this, my grandmother used to refer to anything beige or pale brown as ‘Isabella-coloured’, in reference to the unwashed Queen.

I cannot make these Cappuccino panna cottas without thinking about this description, or my grandmother herself, as it was she that gave me my very first taste of coffee. I almost always drink my coffee black, but occasionally a creamy cappuccino is hard to beat.

Coffee is a natural flavour for a panna cotta, as it pairs so well with cream, and the bitter espresso caramel which is drizzled over the top is a deliciously sweet, bitter and smokey addition (and very easy to make).

The Panna Cotta

(makes 4 larger, 6 smaller darioles)

  • Warm the espresso in a small sauce pan with the milk and sugar, bringing just to a simmer to dissolve the sugar. 

  • Slake the gelatine in cold water for a couple of minutes until completely soft. 

  • Dissolve the gelatine in the still-hot coffee mixture, whisking well to dissolve it. 

  • Add the cream and whisk well. Decant into darioles (or espresso cups for extra kitsch-ness) and leave for at least 4 hours to set. 

150ml espresso
100ml milk 
200ml cream 
50g demerara sugar 
2 leaves of gelatine – 4g 


For the Caramel

(you can make this well in advance and store it for a few days).  

  • In a small saucepan bring the sugar and water to the boil, swirling occasionally to help the sugar dissolve.

  • Cook over a high heat, keeping an eye on it and swirling occasionally until the syrup has turned to a caramel colour, beginning to smell of caramel.

  • Turn the heat down to low, pour in the coffee and whisk well (it will bubble up lots at this point).

  • Whisk gently until the syrup is completely smooth.

  • Leave to cool, then use as required.


40ml water 
80g sugar 
40ml espresso 
Pinch of salt 


You only need a small drizzle over each panna cotta, but it is also good with vanilla ice cream, or on ricotta pancakes even. This panna cotta is especially good with some extra double cream, and then the coffee syrup over the top, for gentle overkill. 

Granmummy Valery

Born, 1929, UK
Grandchildren
John, Eddie, Nick, James, Joy, Ben, Christopher, Letitia & William

My grandmother was a terrifying force in the kitchen. She was a mountain of a woman with a blossom-print blouse, a quivering bosom and beady eyes behind enormous magnifying spectacles. Chaotic, furious, frustrated and fiery, she was no serene domestic goddess. But she had what the Italians call 'mani d'oro',or hands of gold. Everything she touched turned into something magical, even if there was plenty of hair-tearing and bosom-beating along the way.

She just understood food, understood flavour, understood how to get the best out of something scraggy, small or lean. She grew carrots and new potatoes in a tiny pot when she no longer had a garden, and would dig them up when still tiny and sweet and flavourful and we'd eat just one or two. She put butter or cream in almost everything, a proud product of her generation and a lifelong devotee of Curry powder, Prawn Mousse, Patum Peperium, Philadelphia, Porridge with cream and golden syrup, Hellman's Mayonnaise, Curly-leaf Parsley, Hobnobs, Ginger Biscuits and scrambled eggs.

She was never a warm woman, but she showed her love in food. It was also her that got me into coffee, so I have chosen this recipe in her honour.


Letitia Clark x

About Letitia

Letitia2.jpeg

Letitia Clark is a food writer, artist and chef. She is the author of two brilliant cookbooks about Italian food, Bitter Honey & La Vita è Dolce (can’t wait to get my hands on this newest instalment).

She currently lives and works in Sardinia where she hopes to set up her own agriturismo and live la bella vita. Letitia often posts sweet treats inspired by her granny on her instagram, so naturally, I asked if she might want to be the first in a series of granny dedications from my friends in the food world.

Bety, Mexico

Bety, Mexico

“What has always been a part of the way I dine is the concept of sobremesa. It’s the Mexican tradition of spending hours and hours at the table. Even between meals we will stay at the table and snack. It’s something I’ve done since I was a little girl at my own grandmother’s house. For this reason, I always have many snacks here.”

Irma, Texas

Irma, Texas

“I was 21 years old when I married and 29 when he died. They murdered him at a bar. He was celebrating New Year’s Eve and was shot while I was at home with our kids making tamales. He was supposed to be at home. It’s a Mexican custom – being with the family, making tamales and gathering to eat at midnight.”